
Execution modes
Choose Fast, Standard, or Detailed execution mode to balance evidence collection against run speed for monitoring or debugging.
Every run captures evidence: screenshots, video, logs, and metadata. Capturing more makes a failure easier to diagnose but slows the run down. The execution mode is the single dial that sets that trade-off, so you collect everything you need while debugging and stay fast in production.
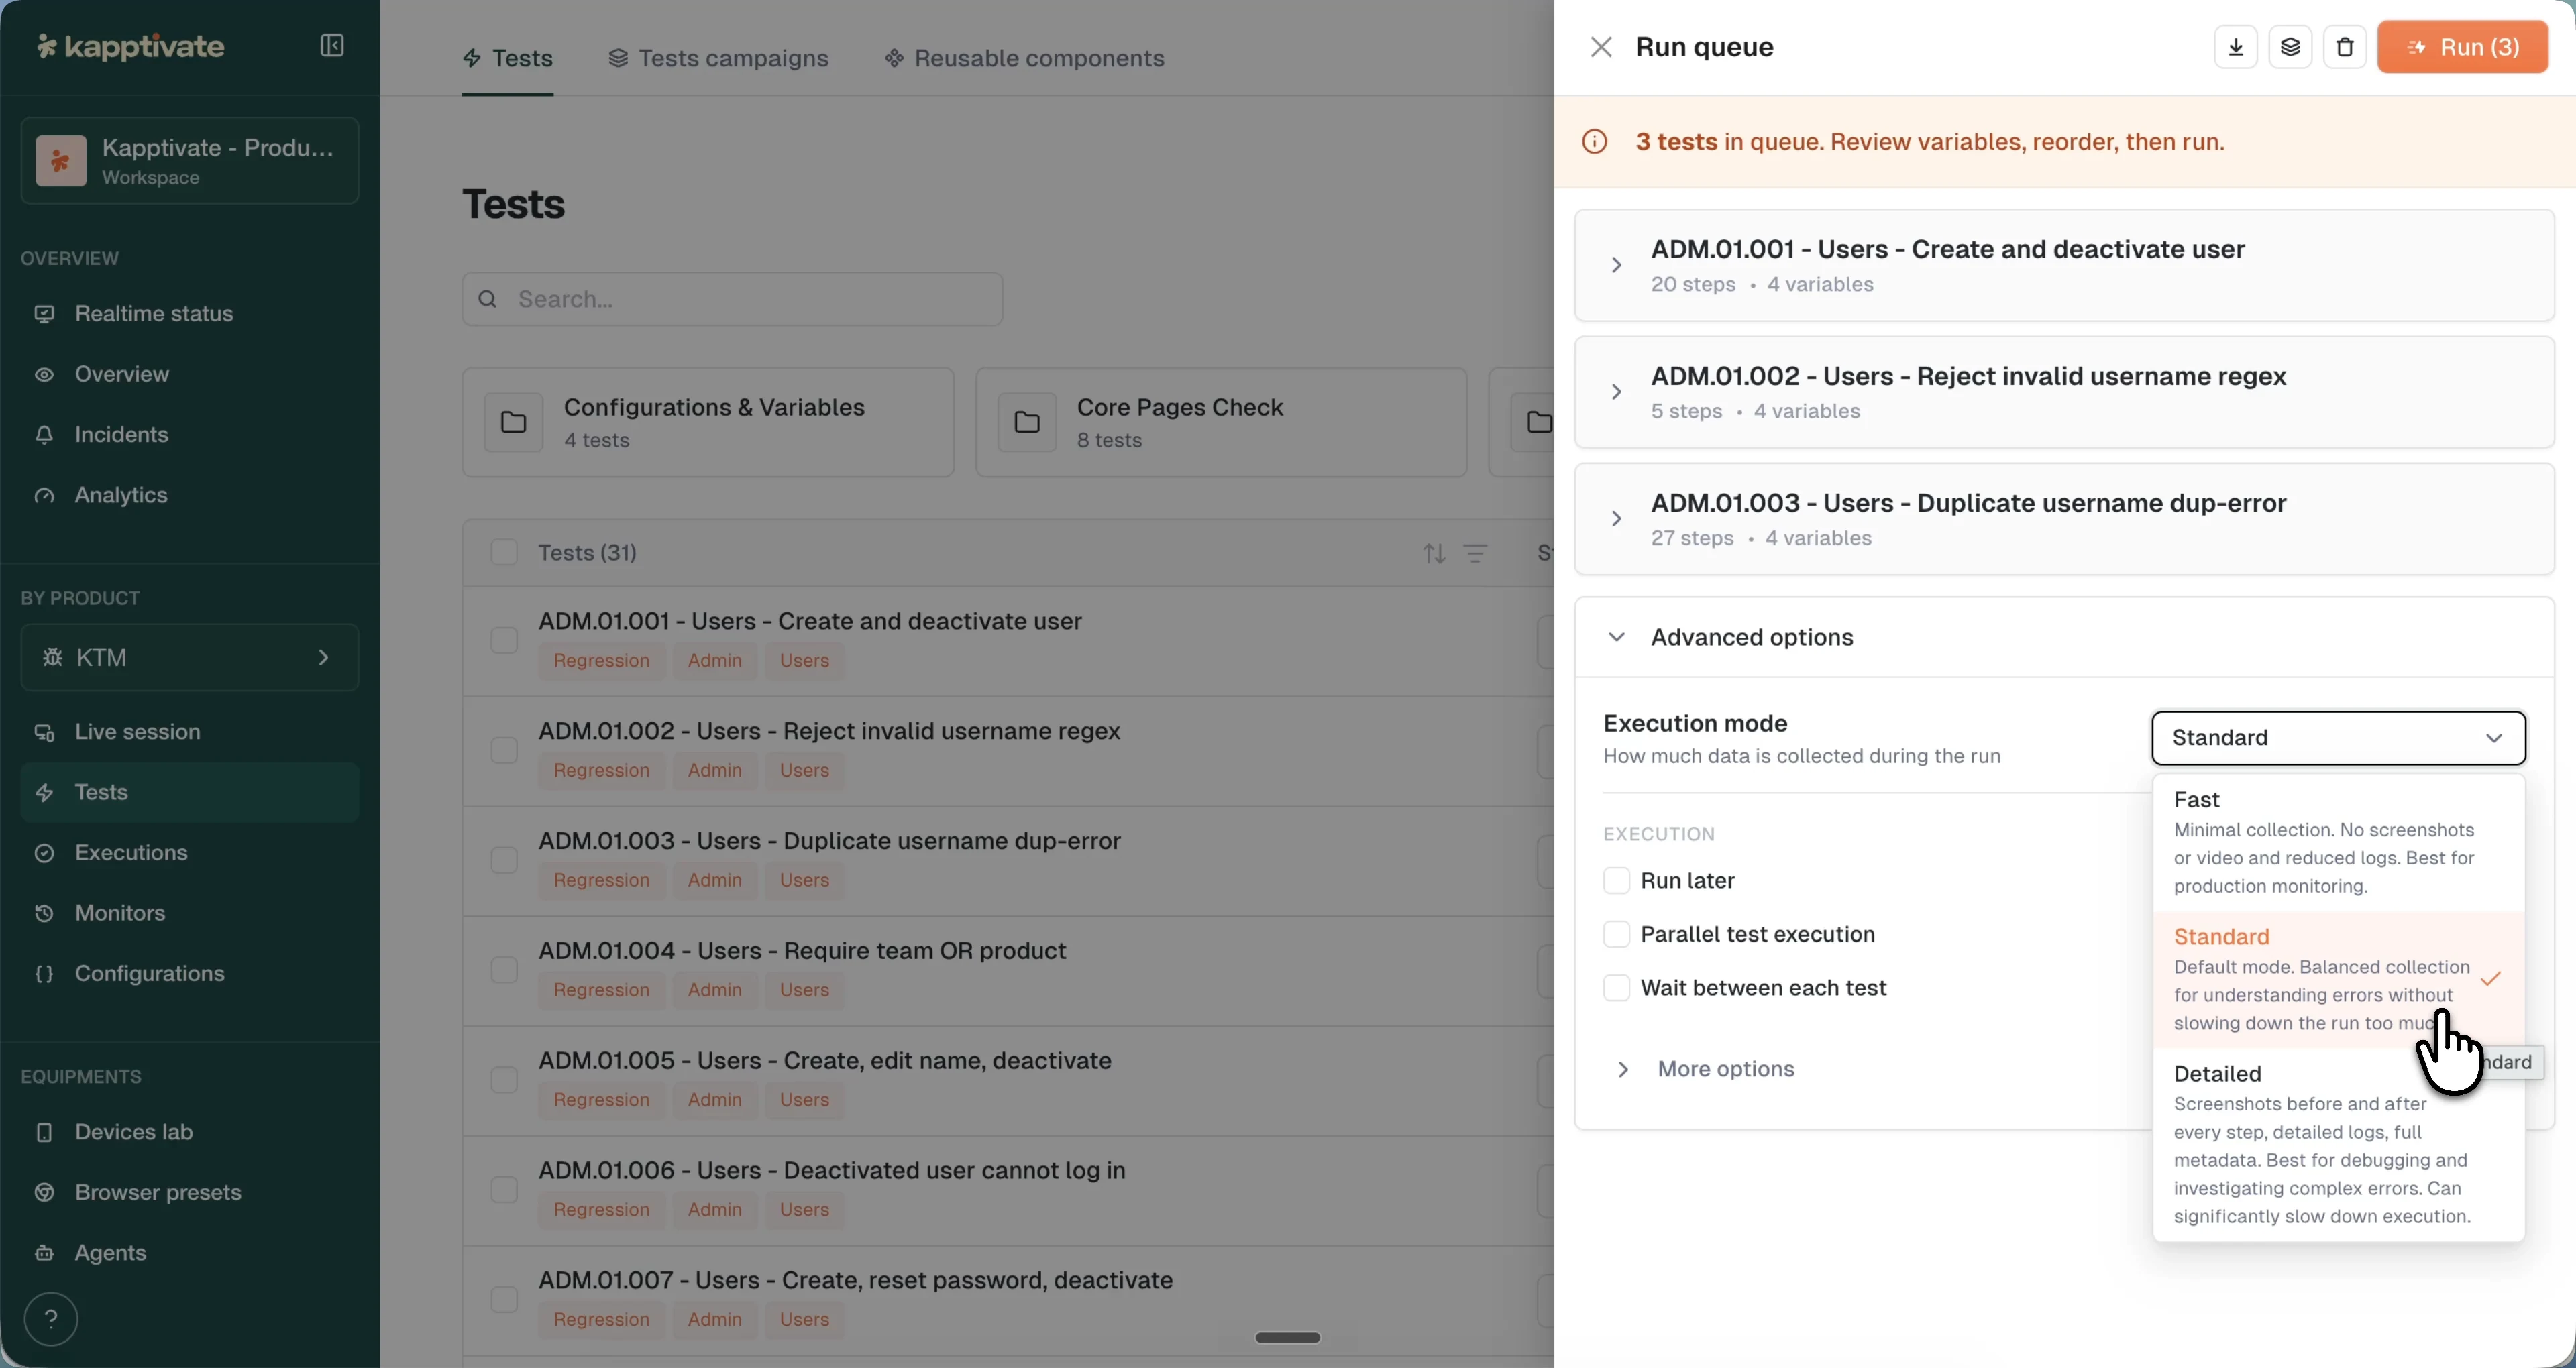
The three modes
- Fast: minimal collection, no screenshots or video and reduced logs. The run finishes as quickly as possible. Best for production monitoring, where you check a journey often and only need to know whether it passed.
- Standard (default): balanced collection. Captures the media you need to understand a failure without slowing the run down much. The right choice for most runs.
- Detailed: takes a screenshot before and after every step, with detailed logs and full metadata. Best for debugging a flaky or failing test, since you can see exactly what the screen looked like at each step. It significantly slows execution, so reach for it when you're investigating, not for routine runs.
Where to set it
For a one-off run, pick the mode in the Run queue panel under Advanced options before you launch. It applies to every test in that batch. See Run a test.
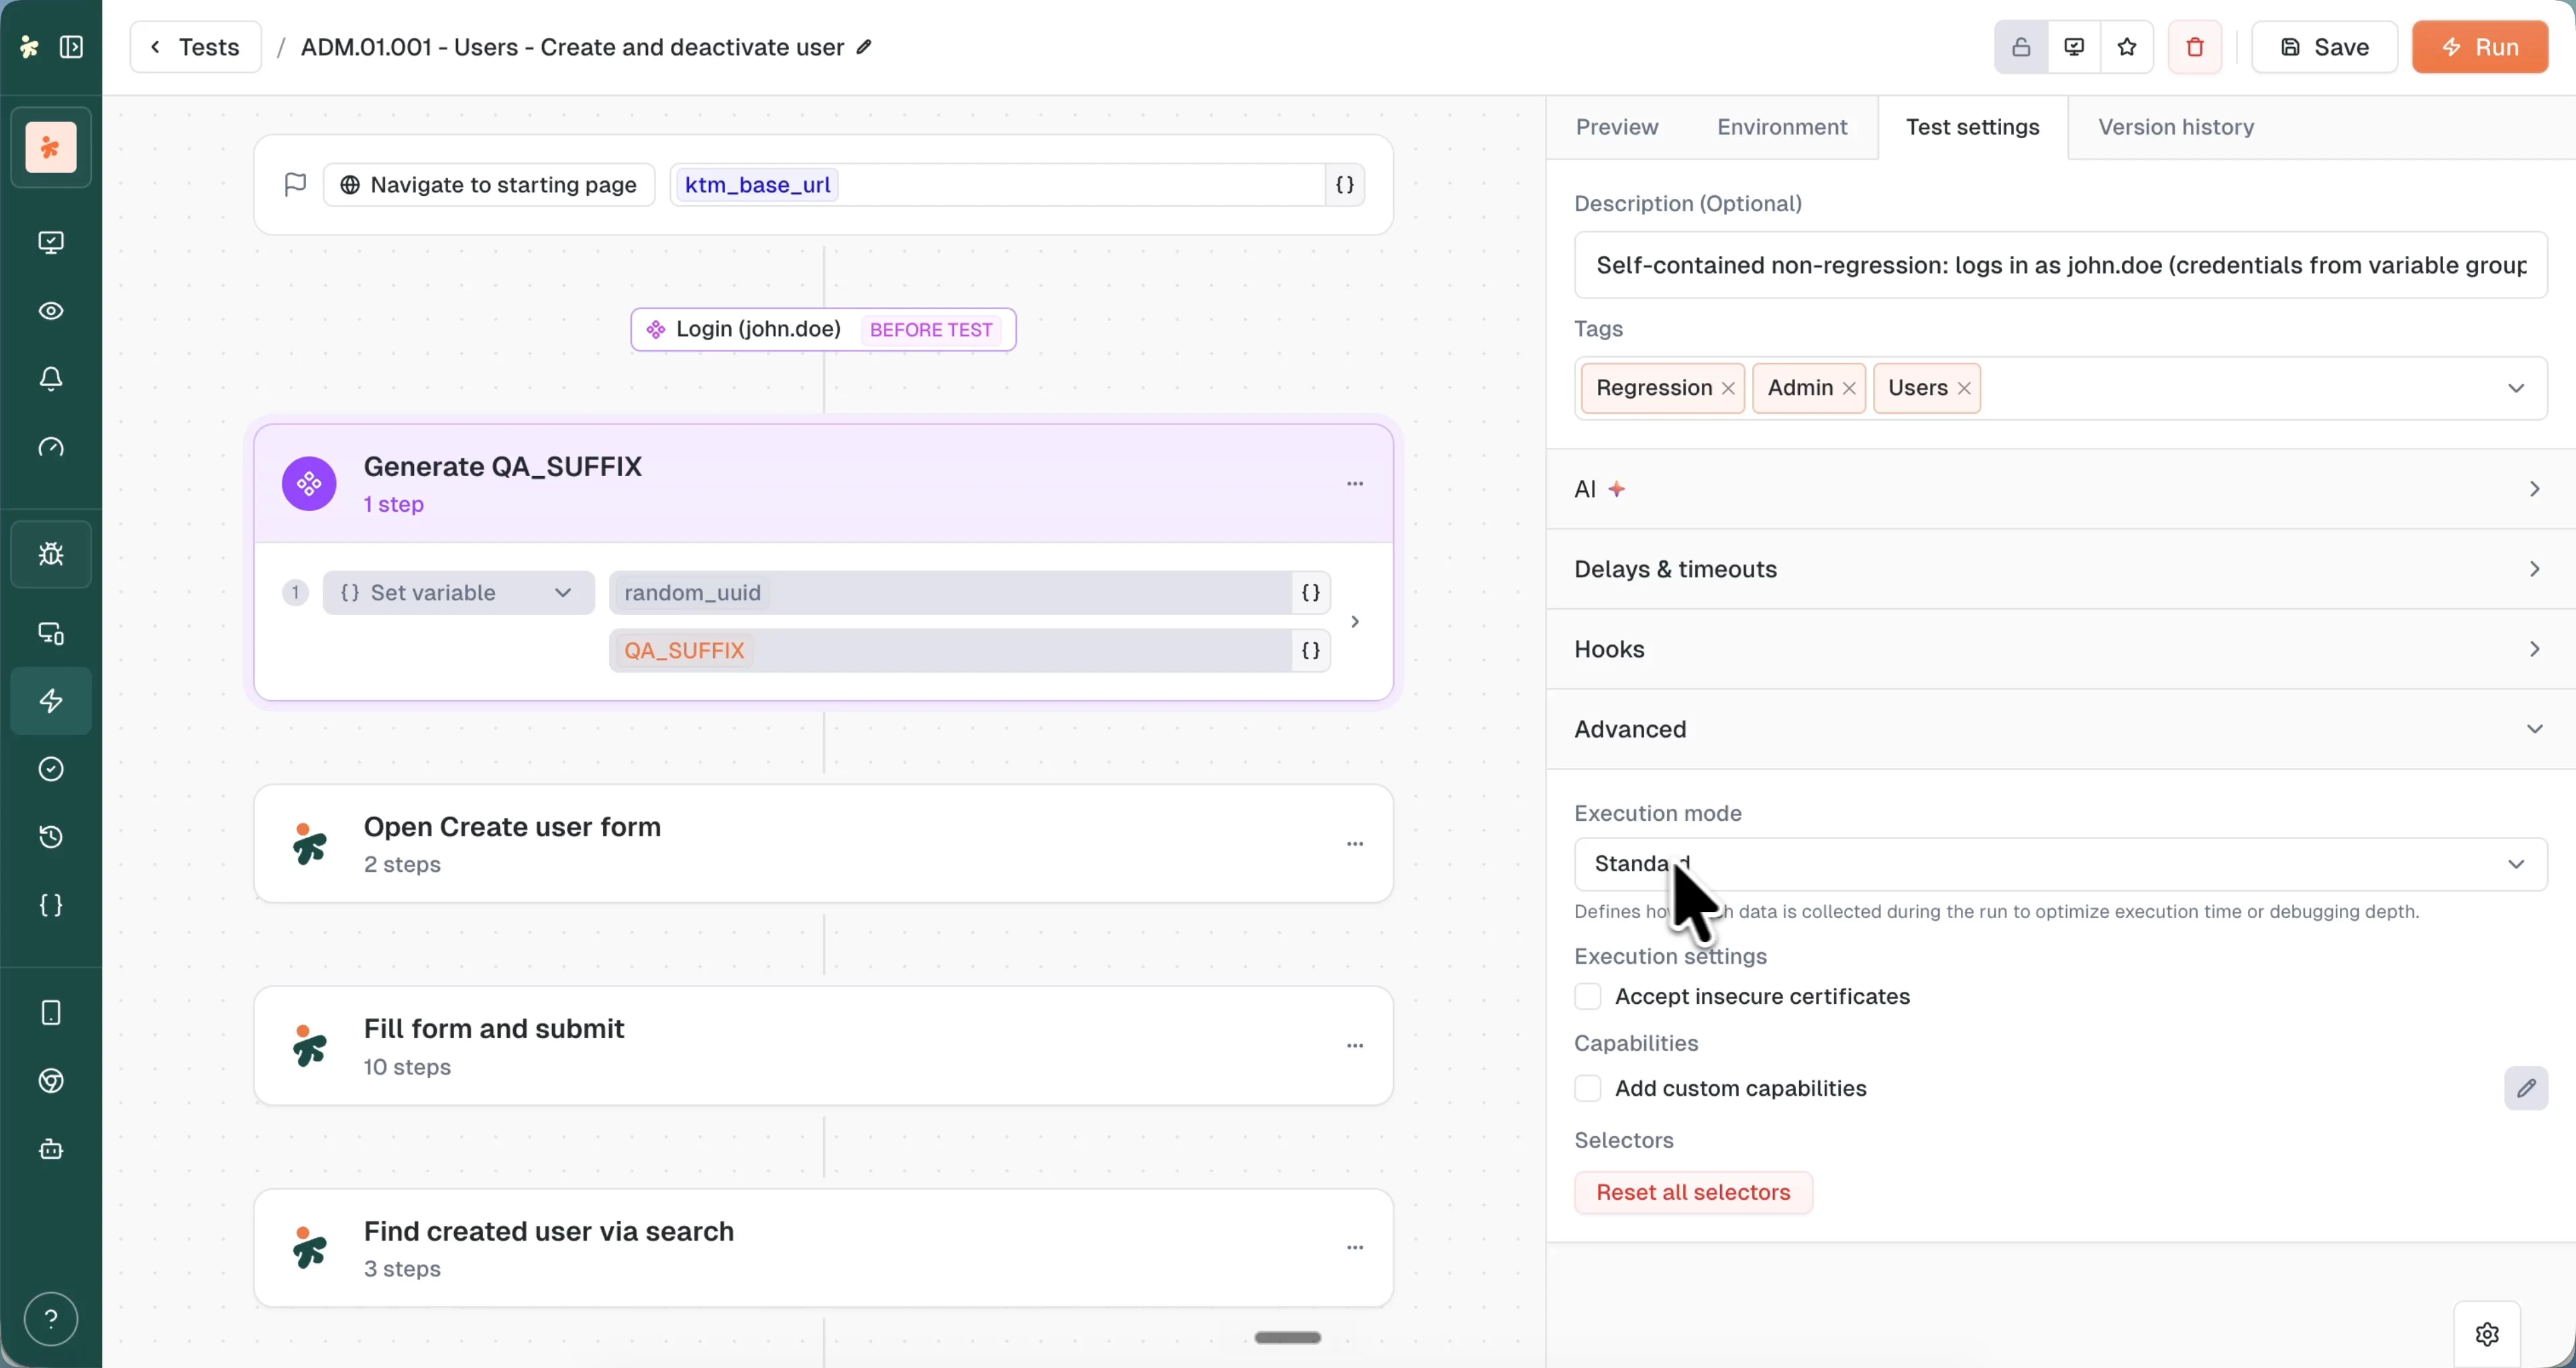
As a test's default, set it in the builder under Test settings > Advanced > Execution mode. The test then runs in that mode wherever it's launched, unless a run overrides it.
Monitors run on a schedule, often many times a day. Keep monitored tests on Fast or Standard so frequent runs stay cheap, and switch to Detailed only while you investigate a failure.
What's next?
Last updated on