
Robot availability notifications
Configure workspace-wide robot availability alerts and notification channels like email, Slack, Teams, and webhooks in Kapptivate.
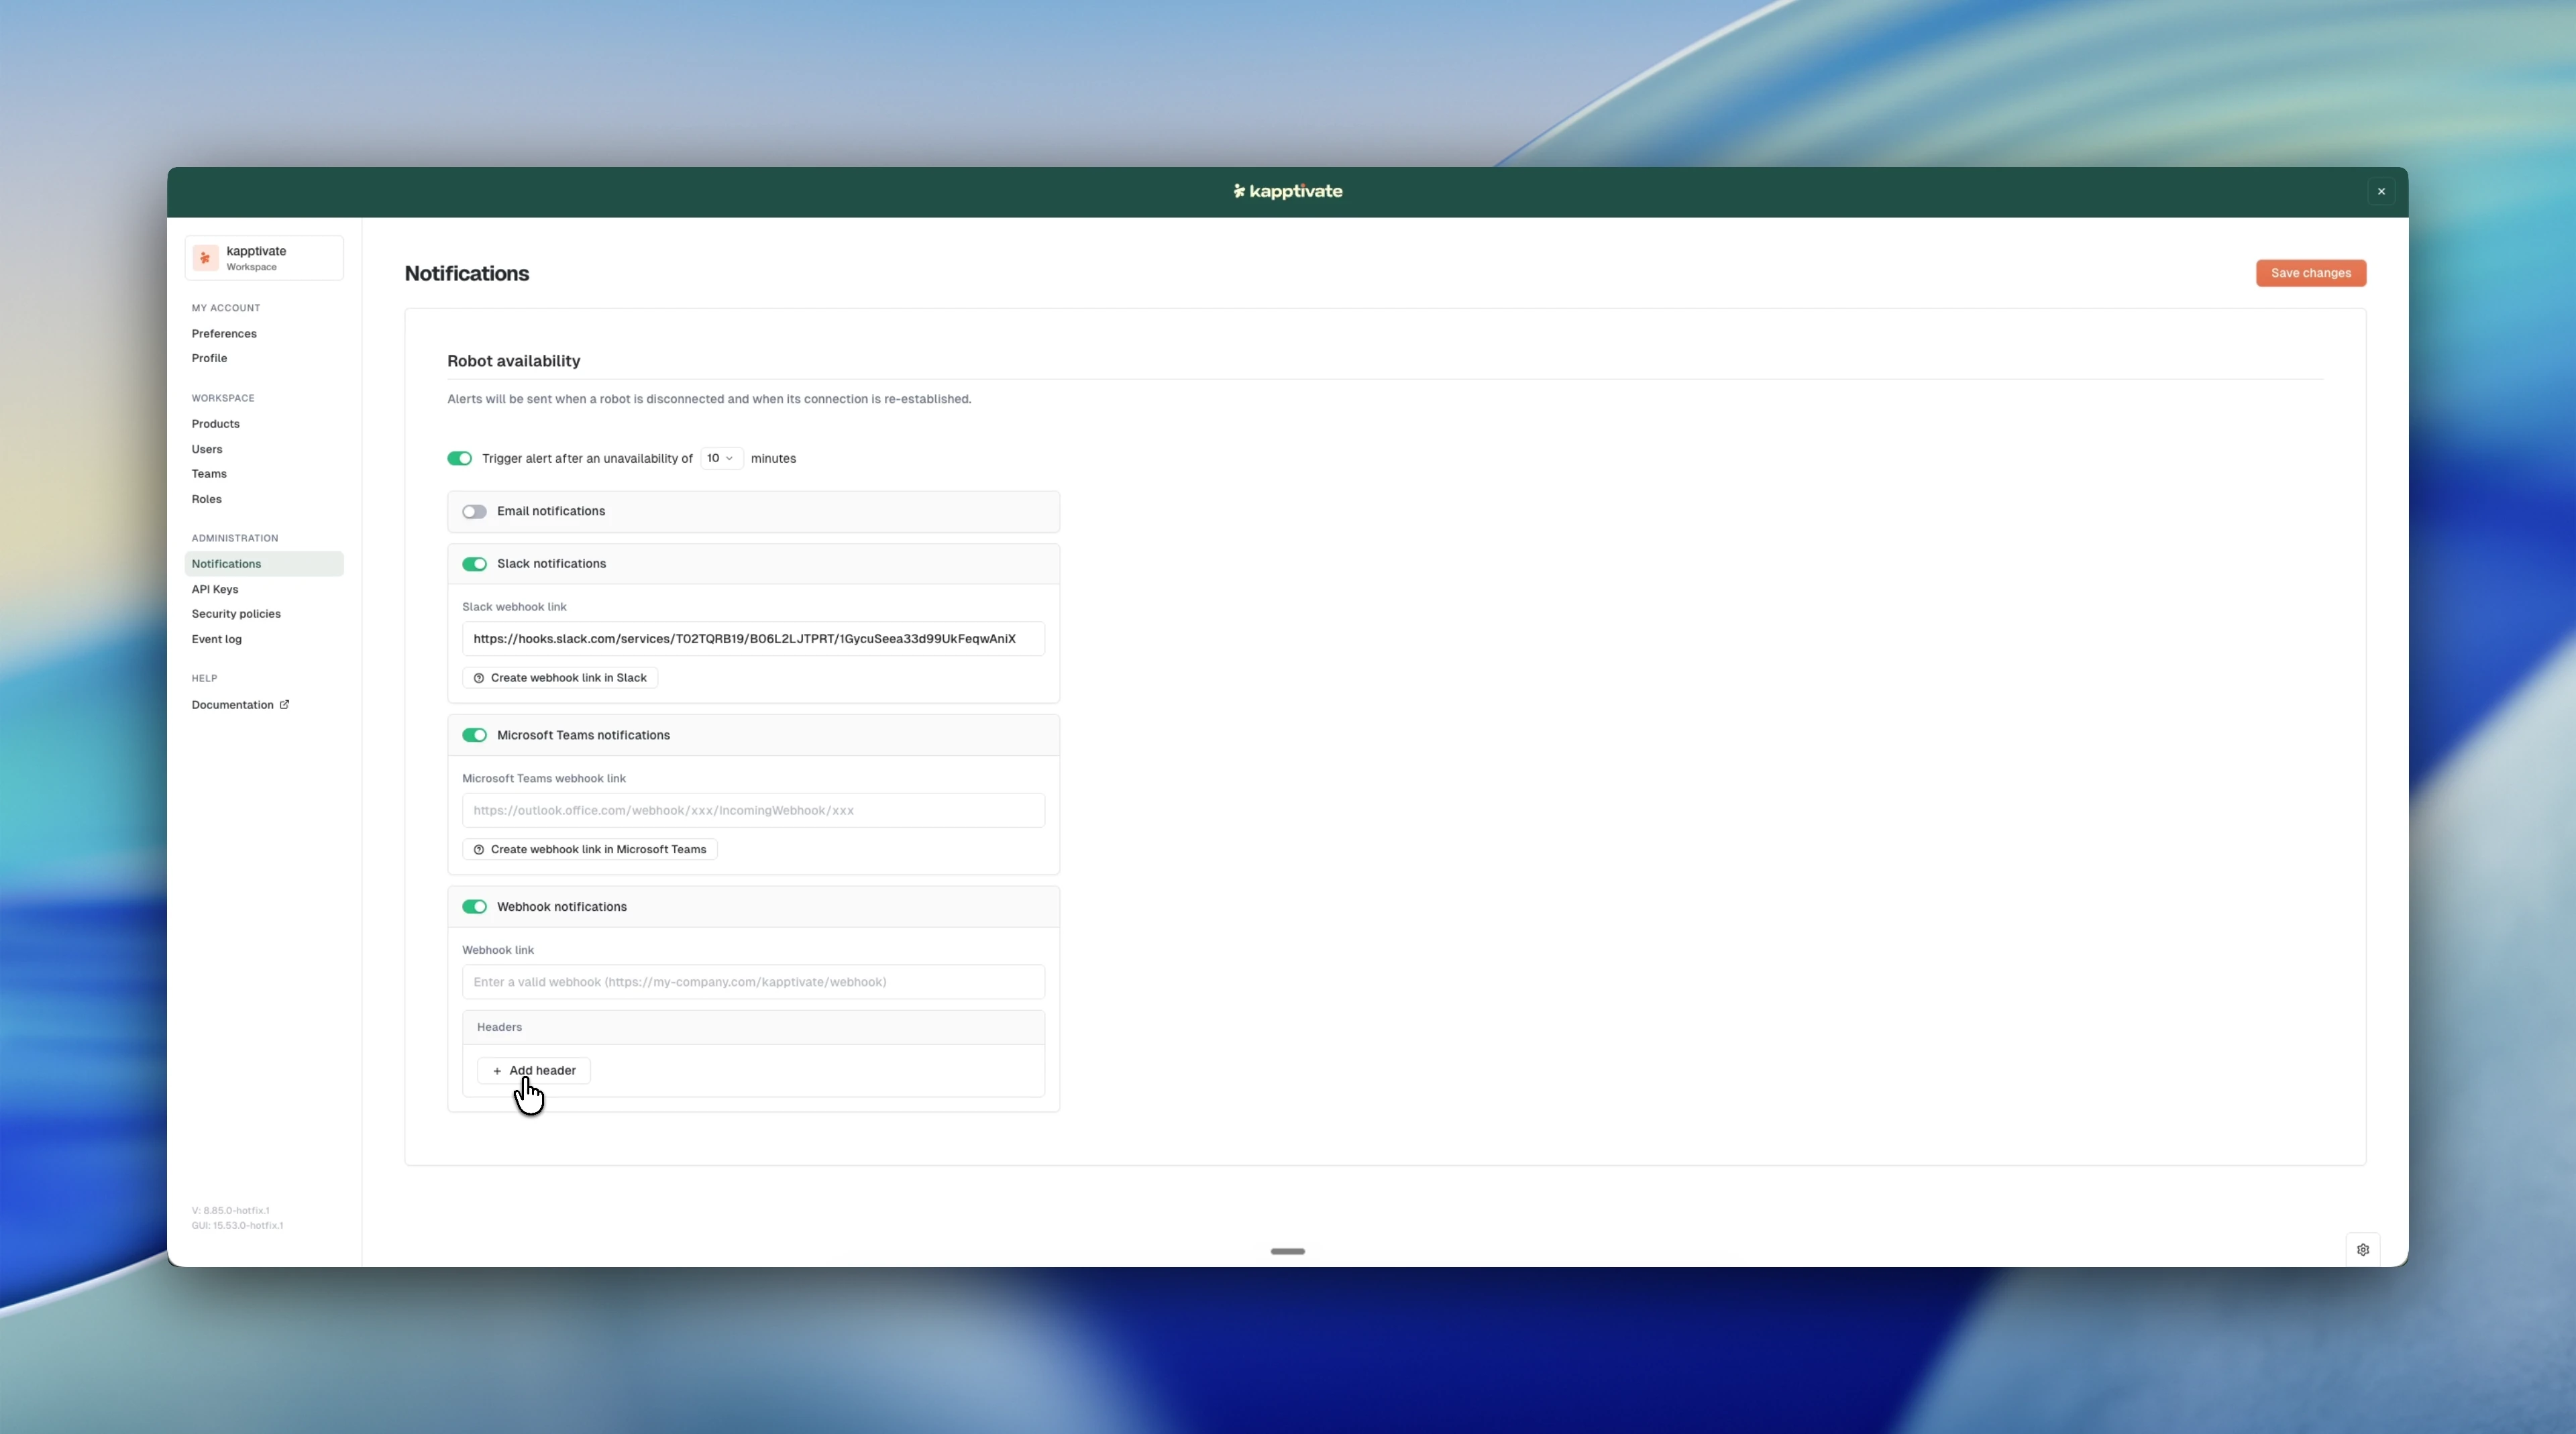
Notifications alert you when robots become unavailable. You enable monitoring, set how long a robot can be down before Kapptivate raises an alert, and choose where the alerts go: email, Slack, Teams, or webhooks. It's all on one screen under Administration → Notifications.
This page covers workspace-wide robot availability alerts. To get notified when a monitor's results degrade, configure notifications per alert in Alerts.
Robot availability
Robot availability monitoring tracks when robots go offline. Alerts are sent both when a robot is disconnected and when its connection is re-established, so you know when an outage starts and when it clears.
Turn it on with the Trigger alert after an unavailability of N minutes toggle, then choose the detection period: how long a robot can be offline before Kapptivate sends an alert, from 5 to 30 minutes in 5-minute increments.
A shorter period catches issues faster but may trigger alerts during brief, expected downtime (such as restarts). A longer period reduces noise but delays your response to genuine outages.
When monitoring is on, you must enable at least one notification channel before you can save.
Notification channels
Channels control where alerts are delivered. Once monitoring is on, each channel can be toggled independently: enable the ones you need and fill in their settings.
Send alerts to one or more email addresses. Enable Email notifications, then under Select users who should be notified enter the recipient addresses.
Slack
Receive alerts in a Slack channel. Enable Slack notifications and paste your Slack webhook link. If you don't have one yet, use the Create webhook link in Slack helper to set one up in your Slack workspace.
Microsoft Teams
Receive alerts in Microsoft Teams. Enable Microsoft Teams notifications and paste your Microsoft Teams webhook link. The Create webhook link in Microsoft Teams helper walks you through creating an incoming webhook in Teams.
Webhook
Send alerts to a custom HTTP endpoint you control. Enable Webhook notifications and provide a Webhook link that Kapptivate will POST to when a robot becomes unavailable.
Under Headers, click Add header to send custom HTTP headers with each request. Enter a key and value for each one, useful for passing an authorization token or routing metadata your endpoint expects.
Save and validation
Click Save changes to apply your settings. The button is disabled if no changes have been made or if your configuration is invalid. Validation requires:
- At least one notification channel enabled while monitoring is on
- Valid email addresses for email recipients
- Valid URLs for Slack, Teams, and webhook links
If validation fails, Kapptivate shows which field has the error. Fix it and save again.
Unsaved changes trigger a confirmation if you navigate away from the page.
What's next?
Last updated on