
Configure the robot network
Everything a wired robot needs before support can deploy it: an address on your network, open flows, and a working path to Kapptivate.
A robot that is only cabled stays invisible, because the platform has no address for it yet. You set that address on the robot itself, screen, keyboard, and mouse plugged into the back, and Kapptivate support takes it from there. Work on a table rather than in the rack: the sockets at the back are much easier to reach.
This procedure applies to the latest generation of Kapptivate robots. On an older robot, change the IP of an older robot covers the address change. For anything else, write to support@kapptivate.com.
Web, cellular, and smartphone robots all start here.
Which flows to open
Networks come in two shapes here, and each shape settles both questions at once. Where the robot has a way out to the internet, it runs on DHCP and nothing needs opening: Kapptivate is reachable on the first boot. Behind a corporate filter, the robot takes a fixed IP instead, and the flows toward Kapptivate are opened from that address.
Support keeps the list of those flows current. Ask support@kapptivate.com for the IP requirements document whenever it suits you, then hand it to your IT department. Only the opening itself waits on the robot's address, so set the static IP before that point.
Either shape leaves one thing undone: the robot never appears on the platform by itself, and support still has to deploy it.
The robot opens every one of these connections itself. Nothing has to reach it from the internet.
Static IP or DHCP
The network decides this one for you: DHCP where the robot reaches the internet, a fixed IP behind a corporate filter. The fixed address pays off twice, since it never moves: support always knows where to find the robot, and your flows stay open on the right target. Set the static IP is what puts it in place.
Under DHCP, the robot takes its lease at boot and leaves you nothing to configure. The cable still has to sit in Ethernet port 1, 2, or 3, since port 4 does not work.
You skip the addressing, not the rest of the page. Checking that the robot reaches Kapptivate and reading its serial number both happen on the robot, so work through connect the peripherals and power on and log in. Then go to check that the robot reaches Kapptivate.
Before you start
- The robot is unpacked, powered, and cabled to the network, but not yet screwed into the rack: see install a robot.
- A USB keyboard, a USB mouse, a screen, and an HDMI cable. None of these ship with the robot.
- The robot's credentials. Ask support@kapptivate.com if you don't have them.
- The IP requirements document, which lists the IP addresses, domains, and ports to check. Ask support@kapptivate.com for it.
- The static IP, mask, gateway, and DNS server addresses, from your IT department.
- Access to the Kapptivate platform, where you watch the robot turn Online.
Set the static IP
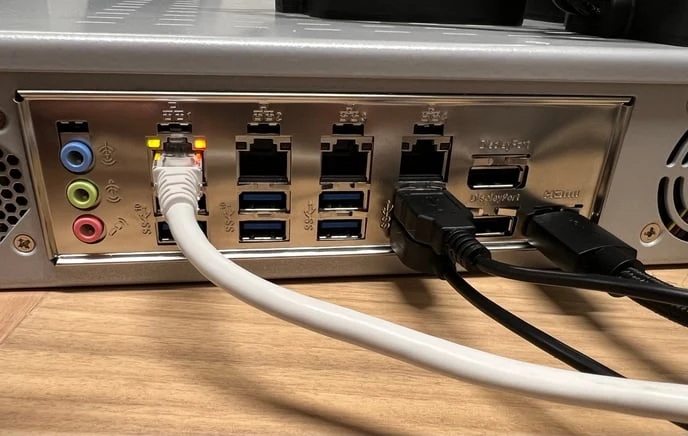
Check which Ethernet port holds the RJ45 cable. Port 1 is the one to use. Ports 2 and 3 work too, but you then pick lan2 or lan3 in step 4 instead of lan1, and port 4 does not work at all.
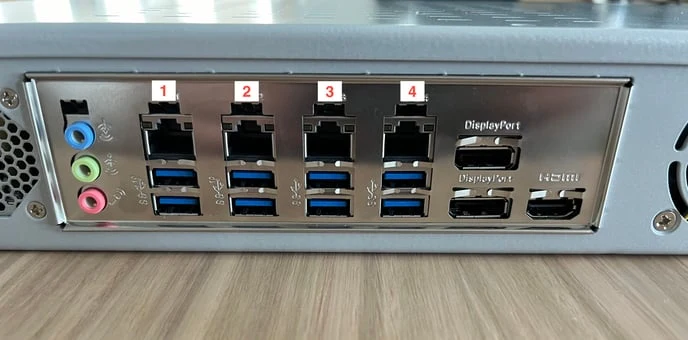
Plug the keyboard, mouse, and HDMI cable into the back of the robot.
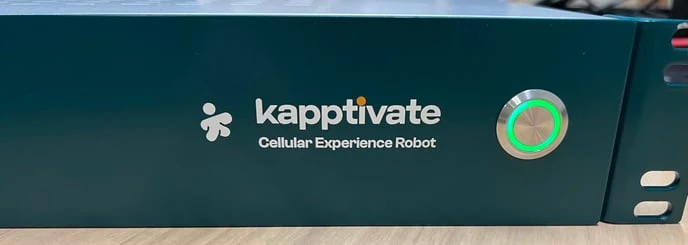
Turn the robot on with the front button. At the login screen, enter the robot's credentials, the ones support@kapptivate.com gave you. You land on a Linux desktop.
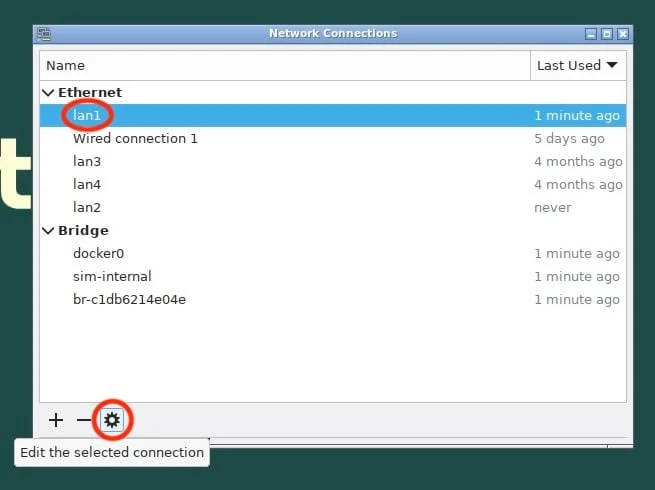
Click the network configuration icon and select Edit Connections.
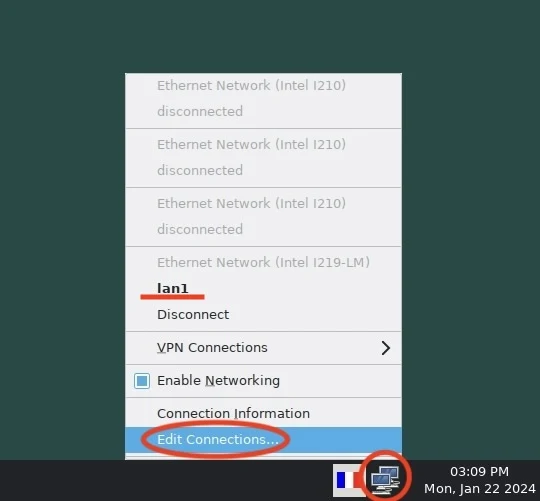
The connection here is named lan1, and yours may carry another name, Wired connection 1 for example. The number follows the port, so pick the connection matching the port you checked in step 1, then edit it.
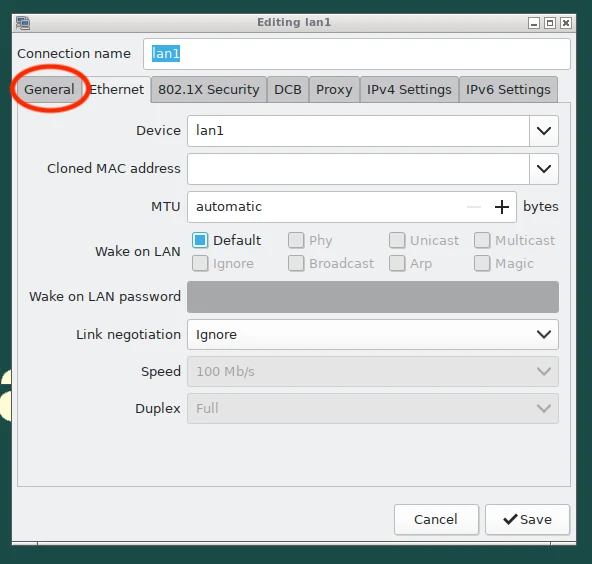
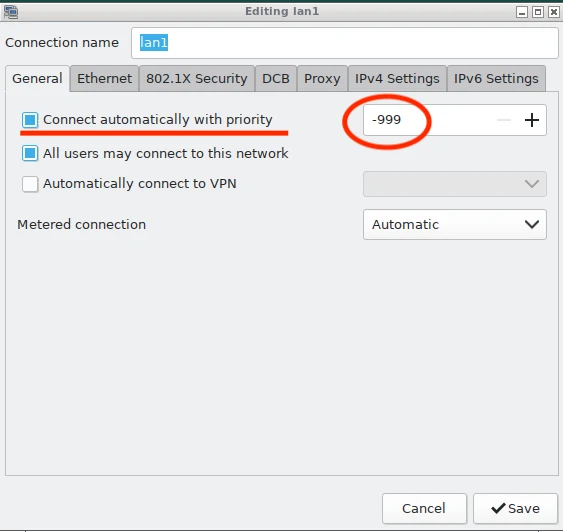
Open General. Connect automatically with priority has to be checked, with the value -999, so check it if it isn't.
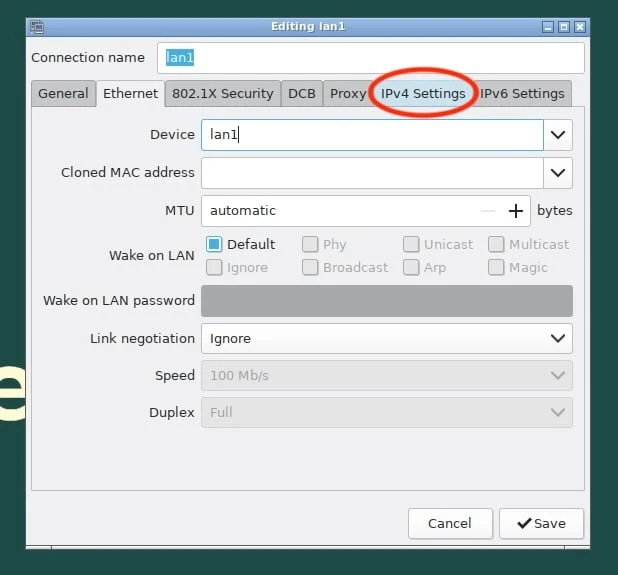
Open IPv4 Settings and change the method from Automatic (DHCP) to Manual.
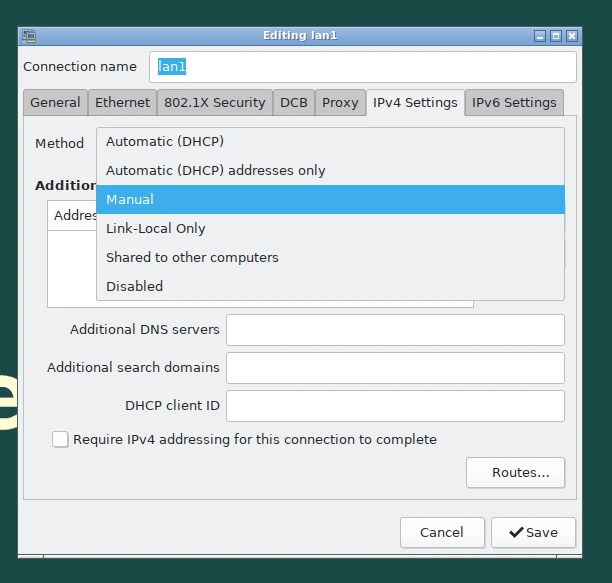
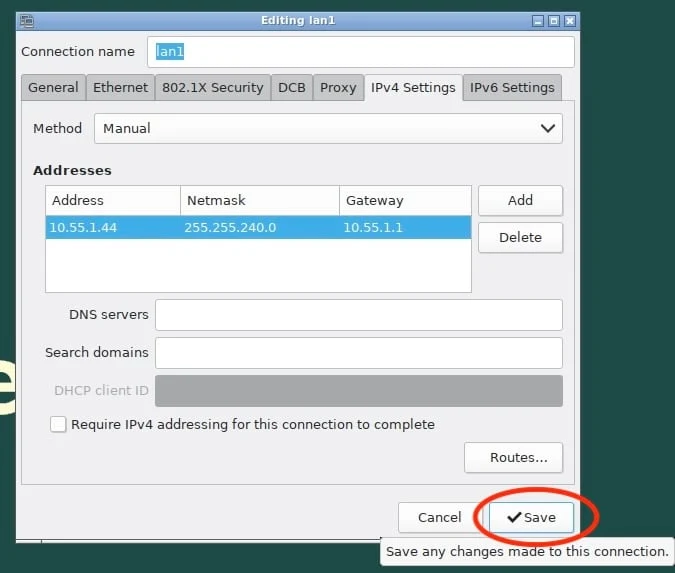
Click Add, then enter the IP address, mask, and gateway from your IT department. Fill the DNS servers field too. Without DNS servers the robot resolves no name and reaches Kapptivate by IP only.
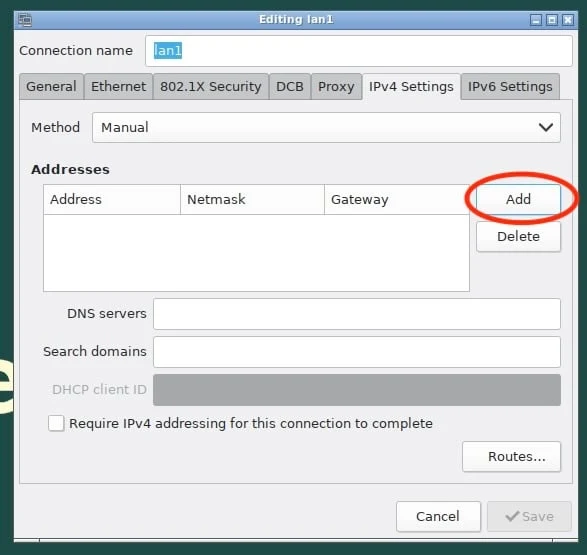
Click Save. The connection comes back up with its new address.
Reboot the robot, from the desktop menu or with sudo reboot in a terminal. Every change you made takes effect on the way back up, and the robot returns on its new address.
Check that the robot reaches Kapptivate
Open a terminal on the Linux desktop, then work through checking the flows, which carries the commands to run and the output to expect.
A check that fails points at the network path rather than at the robot. Take that one point back to your IT department, then run the checks again.
Ask support to deploy the robot
You're nearly there. One number still stands between the robot and the platform: its serial. Read it from the robot and send it to support, who deploys the robot and puts it to work on Kapptivate. In a terminal on the robot:
sudo krobot serialSend the output of that command to support@kapptivate.com, and add the static IP if you set one.
Support does the rest. The robot turns Online in your list of robots with nothing more from you, and that is when you rack it.
Changing the address of a robot that is already deployed? Nothing to ask support. It comes back Online on its own after the reboot. If it stays Offline, work through troubleshooting a robot that stays Offline.
What's next?
Last updated on