
Prepare an Android smartphone
Bring an Android phone into service on a smartphone robot, from Auto Blocker to the battery settings.
A phone straight out of the box isn't ready to run tests. This page walks through the Samsung settings that let a robot keep it awake, reach it over the USB cable, and run mobile app tests on it. Start with Auto Blocker, during the setup wizard: while it's on, no robot can reach the phone.
The paths below come from One UI 7, on Android 15. On an earlier version, some settings sit elsewhere.
In theory, any Android phone works on a robot, but Samsung is the only fully supported brand. On another make, the menu paths won't match the ones below, though the settings to look for stay the same.
Before you start
- The robot is installed, with its USB hub powered on: see install a robot.
- The robot shows Online in the platform: see configure the robot network.
- The phone runs a supported Android version and has at least 4 GB of RAM.
- A USB-C to USB-A cable, preferably a new one. The hub's ports are USB-A, and the phone cables don't ship with the robot. A faulty cable is enough to make the link unstable.
First boot
Turn the phone on and go through the Android setup: pick the language and country you want, and handle the Google and Samsung accounts however you like. Two screens in that setup need attention.
When the setup offers a screen lock, decline it. No password, no PIN, no pattern. The screen has to stay unlocked for the platform to use the phone.
Turn off Auto Blocker
Auto Blocker blocks commands sent over the USB cable, which makes it incompatible with Kapptivate.
It comes pre-ticked on the Samsung services screen of the setup wizard. Untick Auto Blocker, then tap Agree.
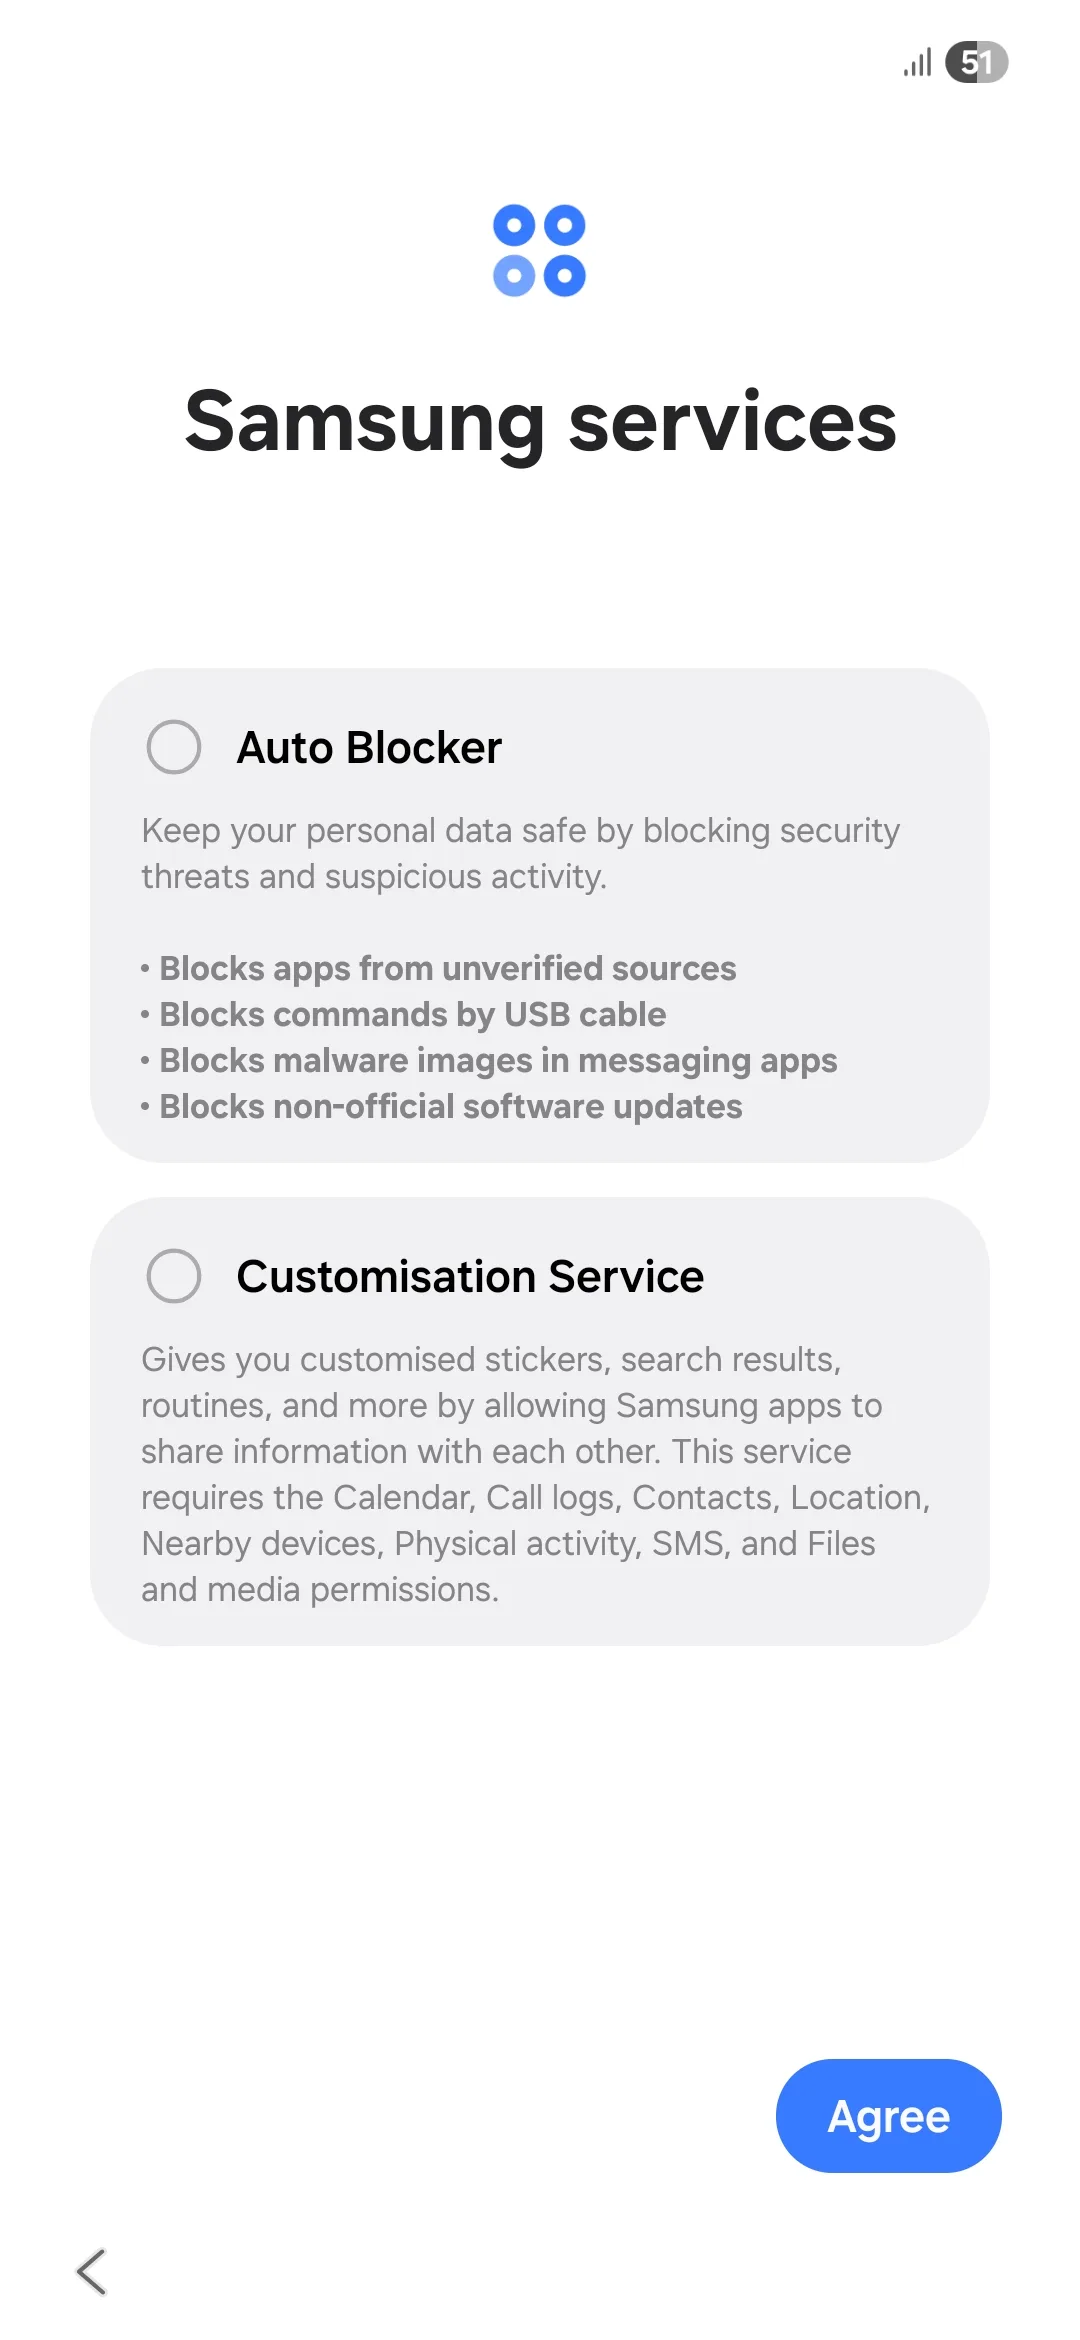
Already past that screen? Go to Settings > Security and privacy > Auto Blocker and turn the switch off. Do it before you set the developer options below.
Set up the phone
In Settings > Apps > Choose default apps > Browser app, check that Chrome is selected. Kapptivate's web tests run on Chrome. Android 15 selects it by default most of the time; if Chrome isn't in the list, install it from the Play Store, then come back.
Open Settings > About phone > Software information and tap Build number several times, until Android confirms that developer mode is on. Developer options then appears at the bottom of the Settings list.
In Settings > Developer options, set these six:
| Setting | State |
|---|---|
| Stay awake | On |
| Auto update system | Off |
| USB debugging | On |
| Disable adb authorization timeout | On |
| Verify apps over USB | Off |
| Verify bytecode of debuggable apps | Off |
USB debugging is the one that makes the phone drivable over the cable at all.
On a phone that has been used before, tap Revoke USB debugging authorizations in the same list, before you plug it into the robot. Old authorizations can get in the way of the connection. On a new phone, there is nothing to revoke.
The next three settings all start from Settings > Battery, on three different screens.
Open Background usage limits and turn Put unused apps to sleep off. On the same screen, open the menu at the top right, choose Adaptive battery, and turn it off too.
Back on Settings > Battery, scroll down to Charging settings and turn Fast charging off. Fast charging wears the battery down faster.
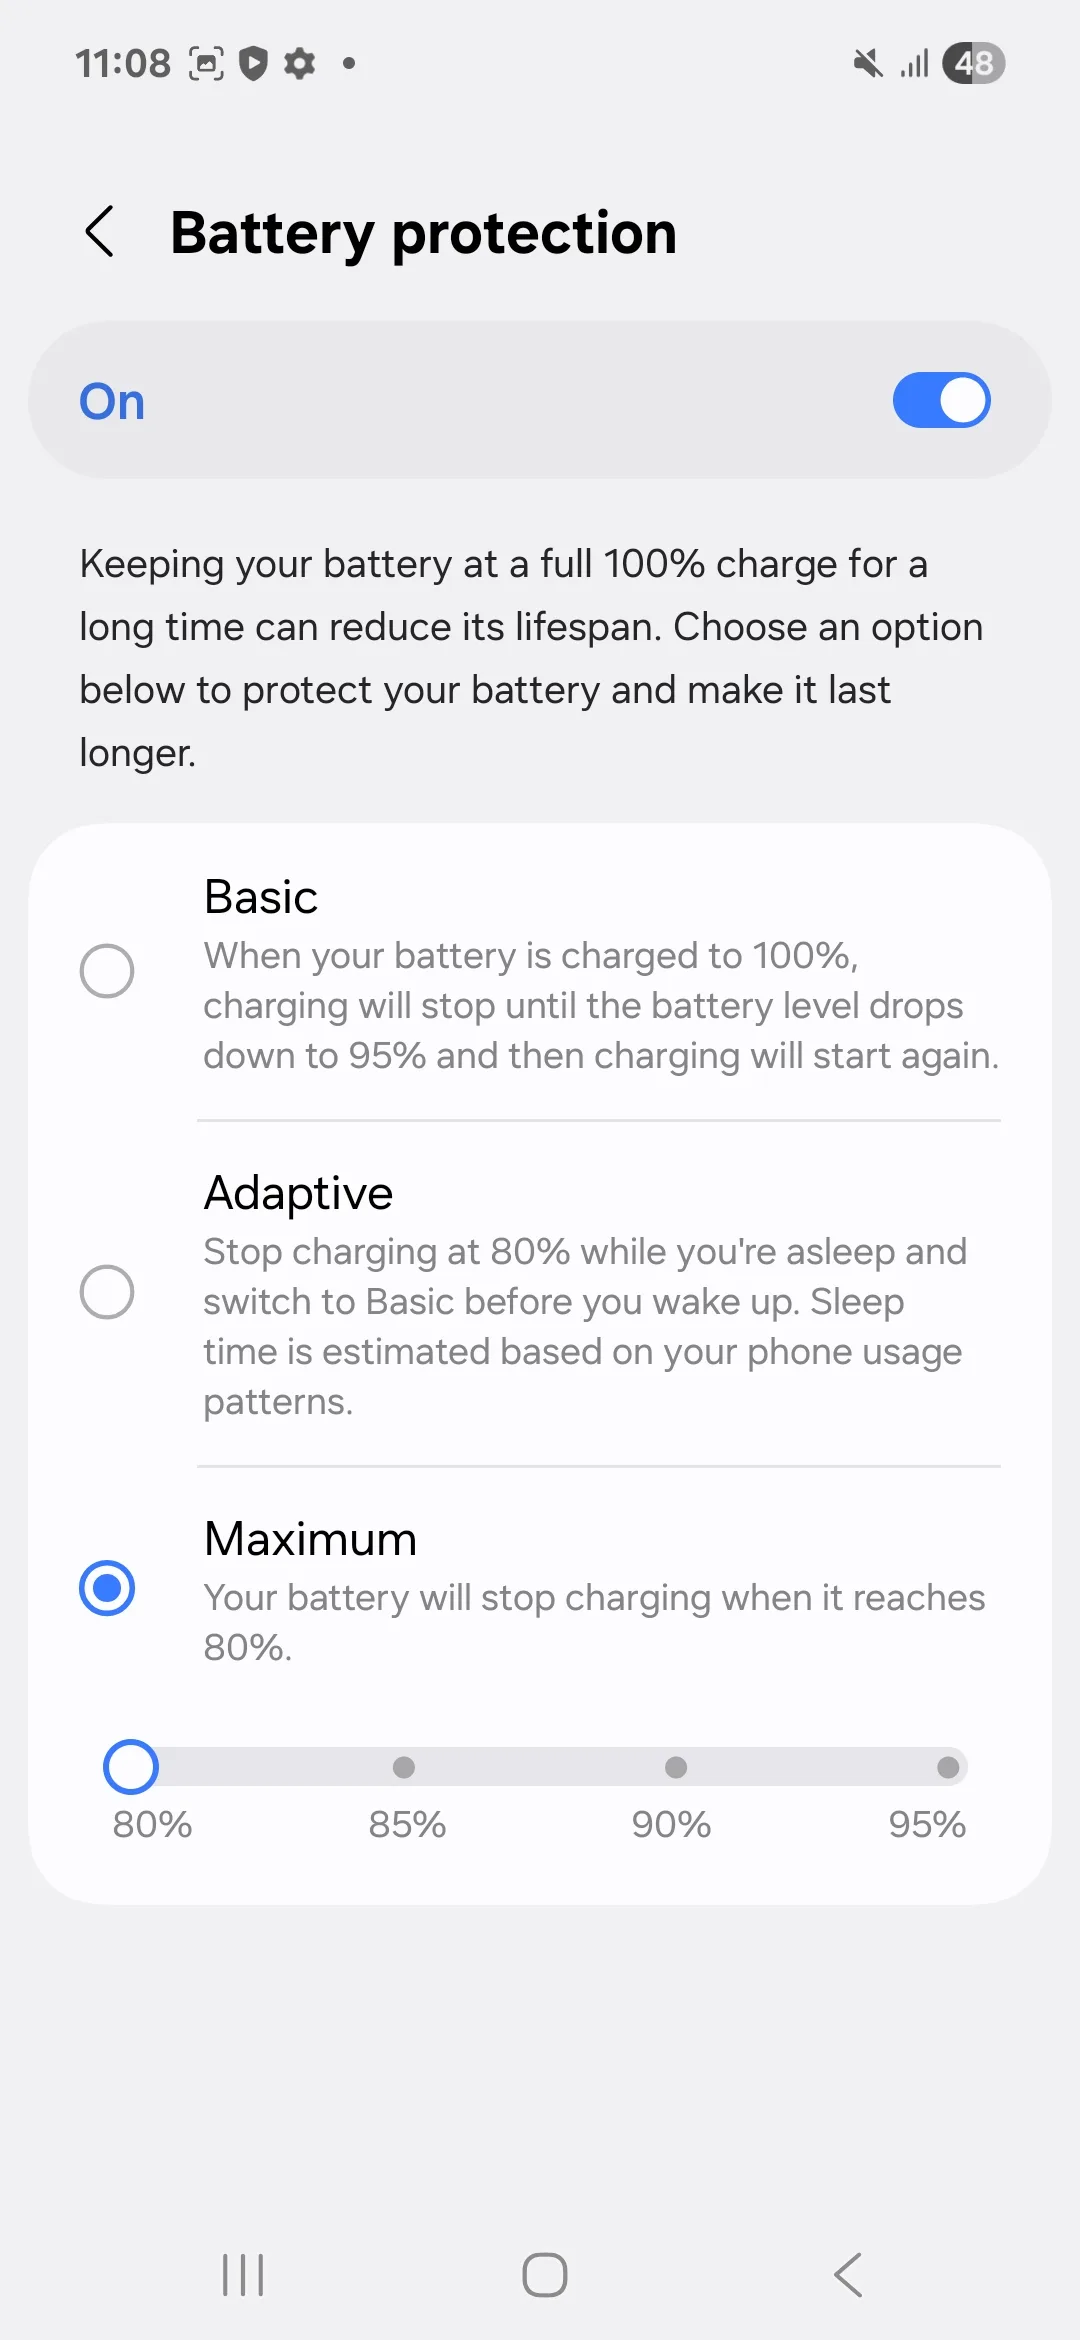
Still under Settings > Battery, open Battery protection. Turn it on, select Maximum, and set the slider to 80%.
Maximum stops charging at 80% instead of holding the phone at 100% permanently. That is what keeps the battery from swelling over time.
Stand the phone up on a holder once it's plugged in, too. Air then moves behind the case instead of sitting against a flat surface.
Under Settings > Software update, open Auto download and select Never. The platform supports Android 8 to 16, and an update can push the phone past the versions it covers.
Connect the phone to the robot
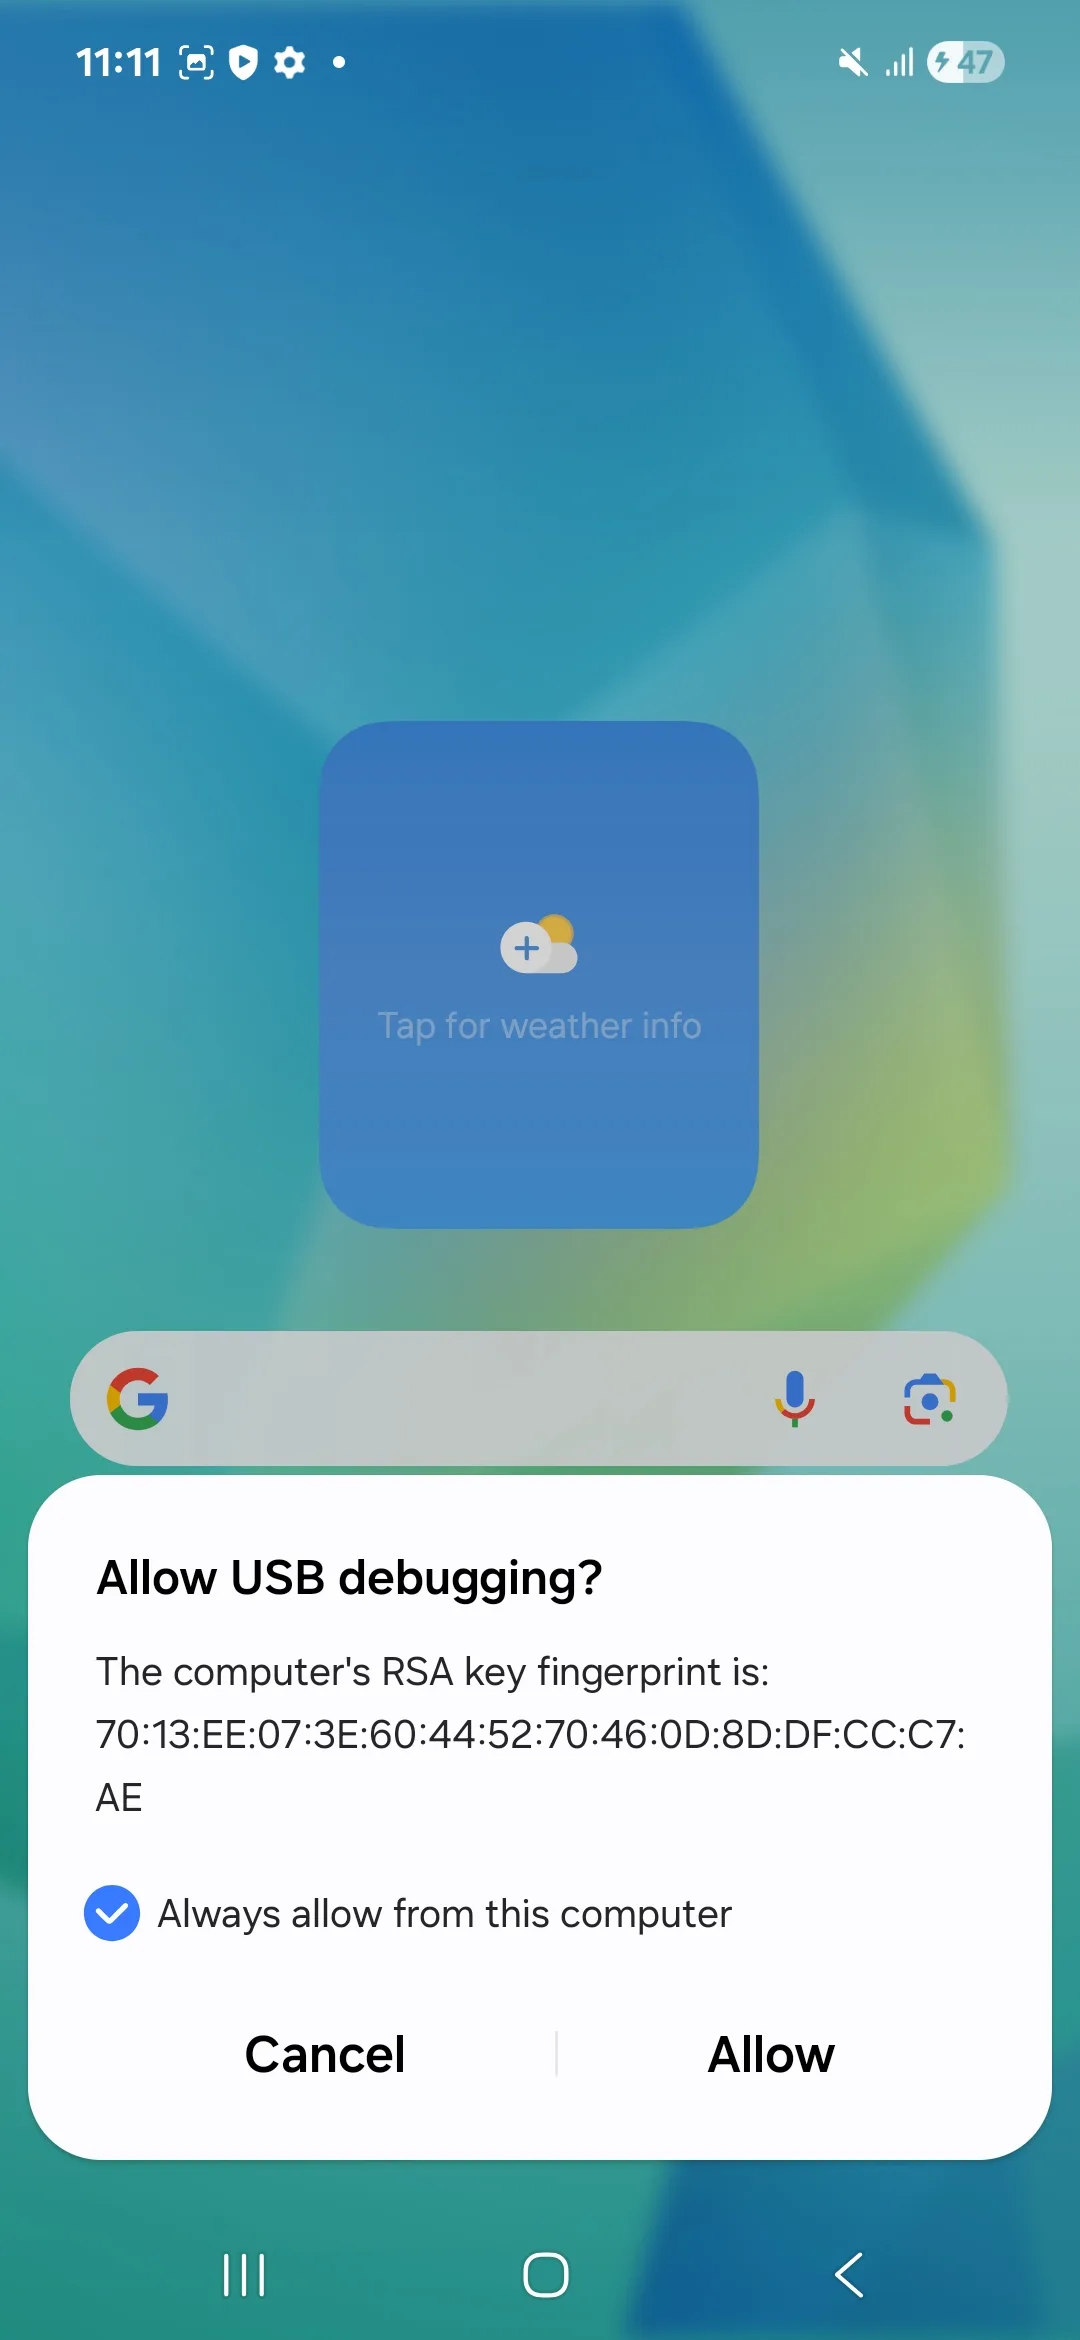
Plug the phone into a free USB port of the hub. If it was already plugged in, unplug it and plug it back: the popup only fires on connection.
On the phone, tick Always allow from this computer, then tap Allow.
Check that it worked
Open the Kapptivate platform and go to Agents, where the platform lists your robots. Open yours: the phone appears in its device list and shows Available once it is ready to take tests.
A device only becomes available when its own status is Available and the robot carrying it is Online. If the phone shows nothing, look at the robot first.
If the phone never appears at all, unplug and replug the cable and watch whether the authorization popup shows up. If you aren't sure you confirmed it, or if it never appeared, unplug the phone, tap Revoke USB debugging authorizations under Settings > Developer options, and plug it back: the popup then comes up for certain.
If the popup was confirmed and the phone still doesn't show up, check Auto Blocker under Settings > Security and privacy. If that switch is off too, write to support@kapptivate.com with the robot name.
What's next?
Last updated on