
Install a robot
Power and cable a new Kapptivate robot, then add the antennas or the USB hub its type calls for.
Power and an RJ45 cable start every robot the same way, whatever its type. What comes next depends: antennas and SIMs on a cellular robot, a USB hub on a smartphone robot. A web robot needs neither. By the end of this page, yours is in place, powered, and on the network.
This procedure covers the latest generation of Kapptivate robots. Write to support@kapptivate.com if yours is older.
Prepare the installation
Unpack the robot, the black power cable, and the RJ45 cable:
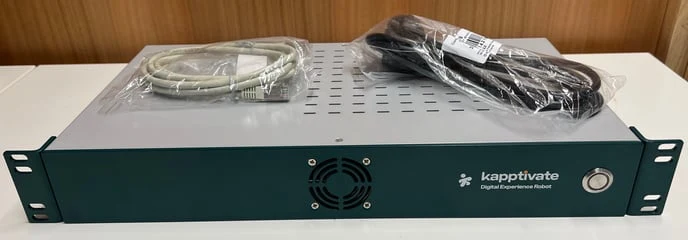
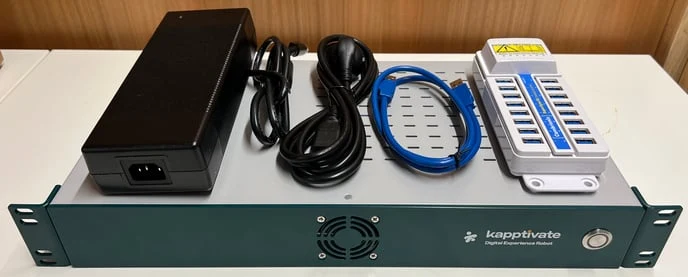
The box also holds the antennas or the USB hub, and how many depends on the robot type:
| Robot type | In the box |
|---|---|
| Cellular 5G | 8 antennas, 4 for each of the 2 modems |
| Cellular 4G | 4 antennas, 1 for each of the 4 modems |
| Smartphone | A USB hub, a blue USB cable, and a power supply for the hub |
Kapptivate doesn't ship a SIM ejector tool, and a 4G robot needs one. Bring your own.


A rack earns its place here. You reach the back of the robot without unplugging anything, and nothing starves the fans. A shelf or a table works too, if that's what the site has.
If it goes into a rack, configure the network before the screws go in. That step needs a screen and a keyboard plugged into the back of the robot, and a table beats a rack for that. Then slide the robot into a free rack slot and tighten two screws on each side.
The front panel takes air in, the back panel pushes it out. Keep both clear.
Connect power and network
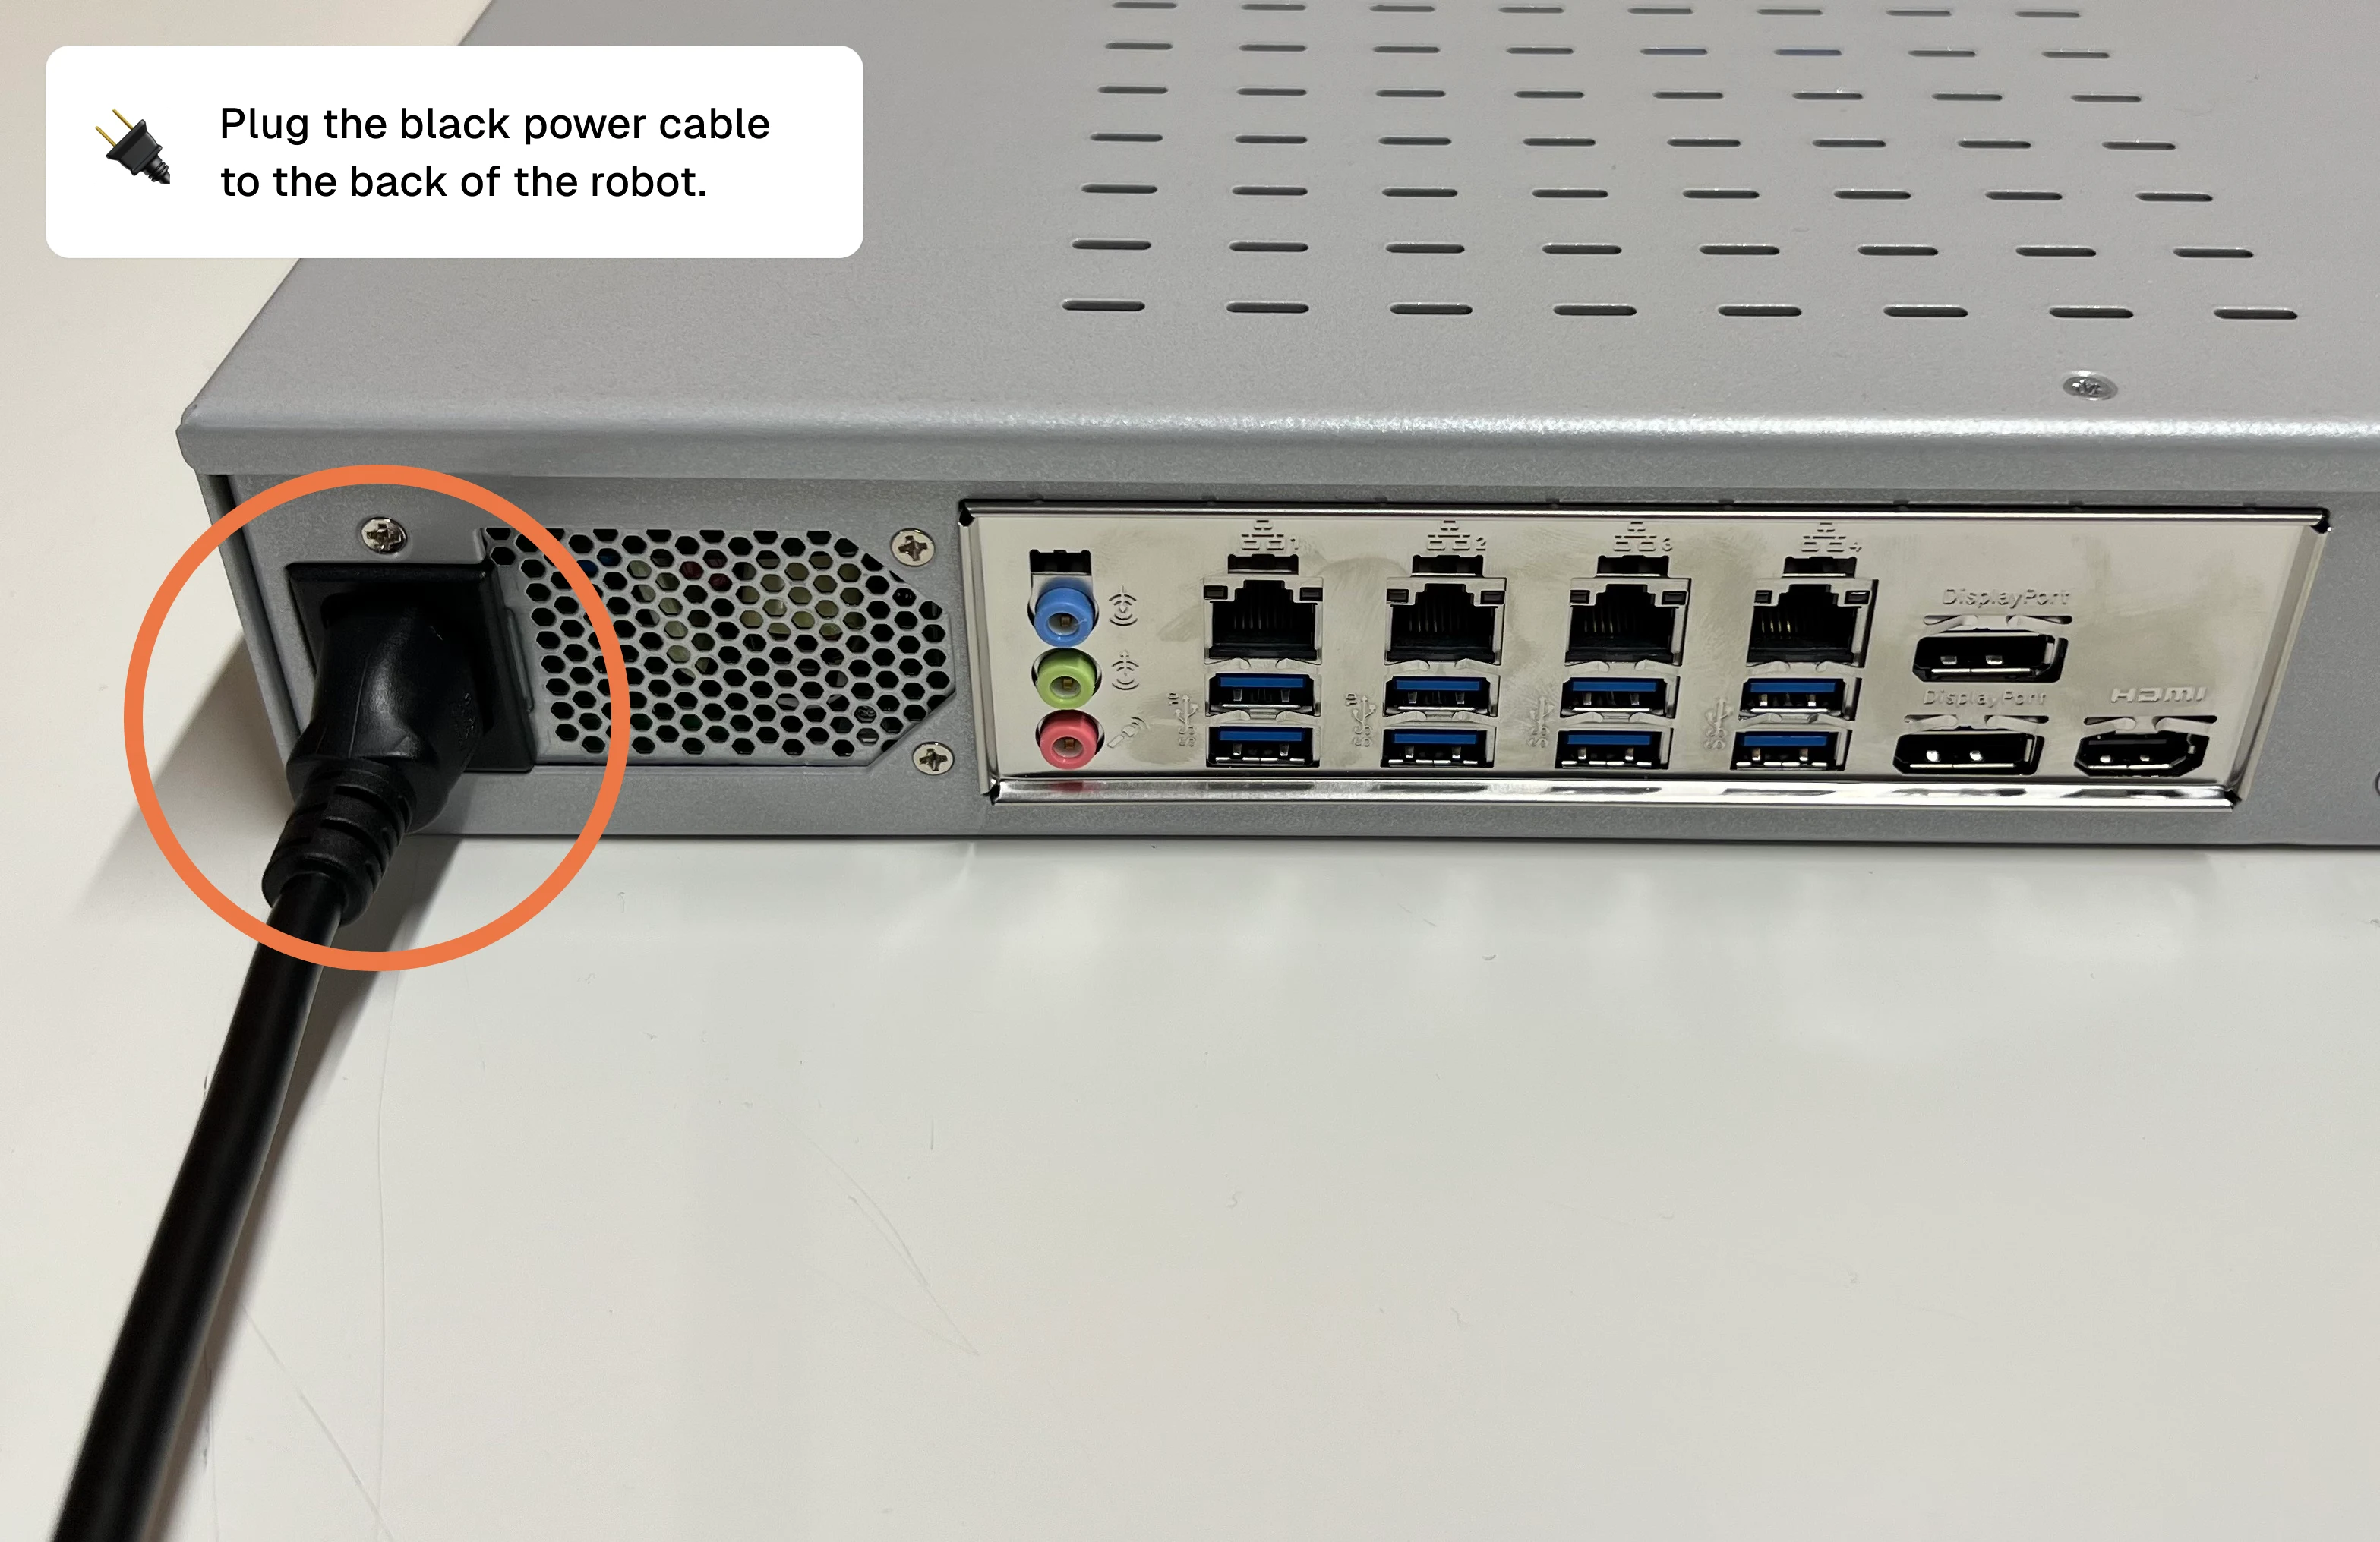
Plug the black power cable into the back of the robot:
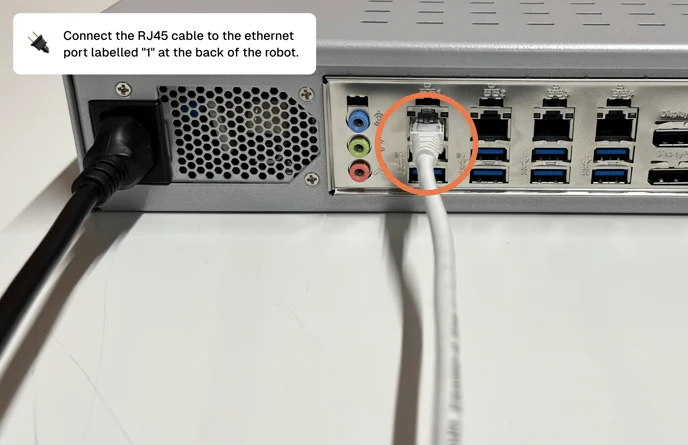
Connect the RJ45 cable to the Ethernet port labeled 1, on that same back panel. Ports 2 and 3 work too, as long as you declare lan2 or lan3 instead of lan1 when you configure the robot network. Port 4 isn't wired, so don't go hunting for a setting.
A web robot needs nothing else: power and network are its whole installation. Cellular and smartphone robots continue below.
Antennas and SIMs (5G cellular robots)
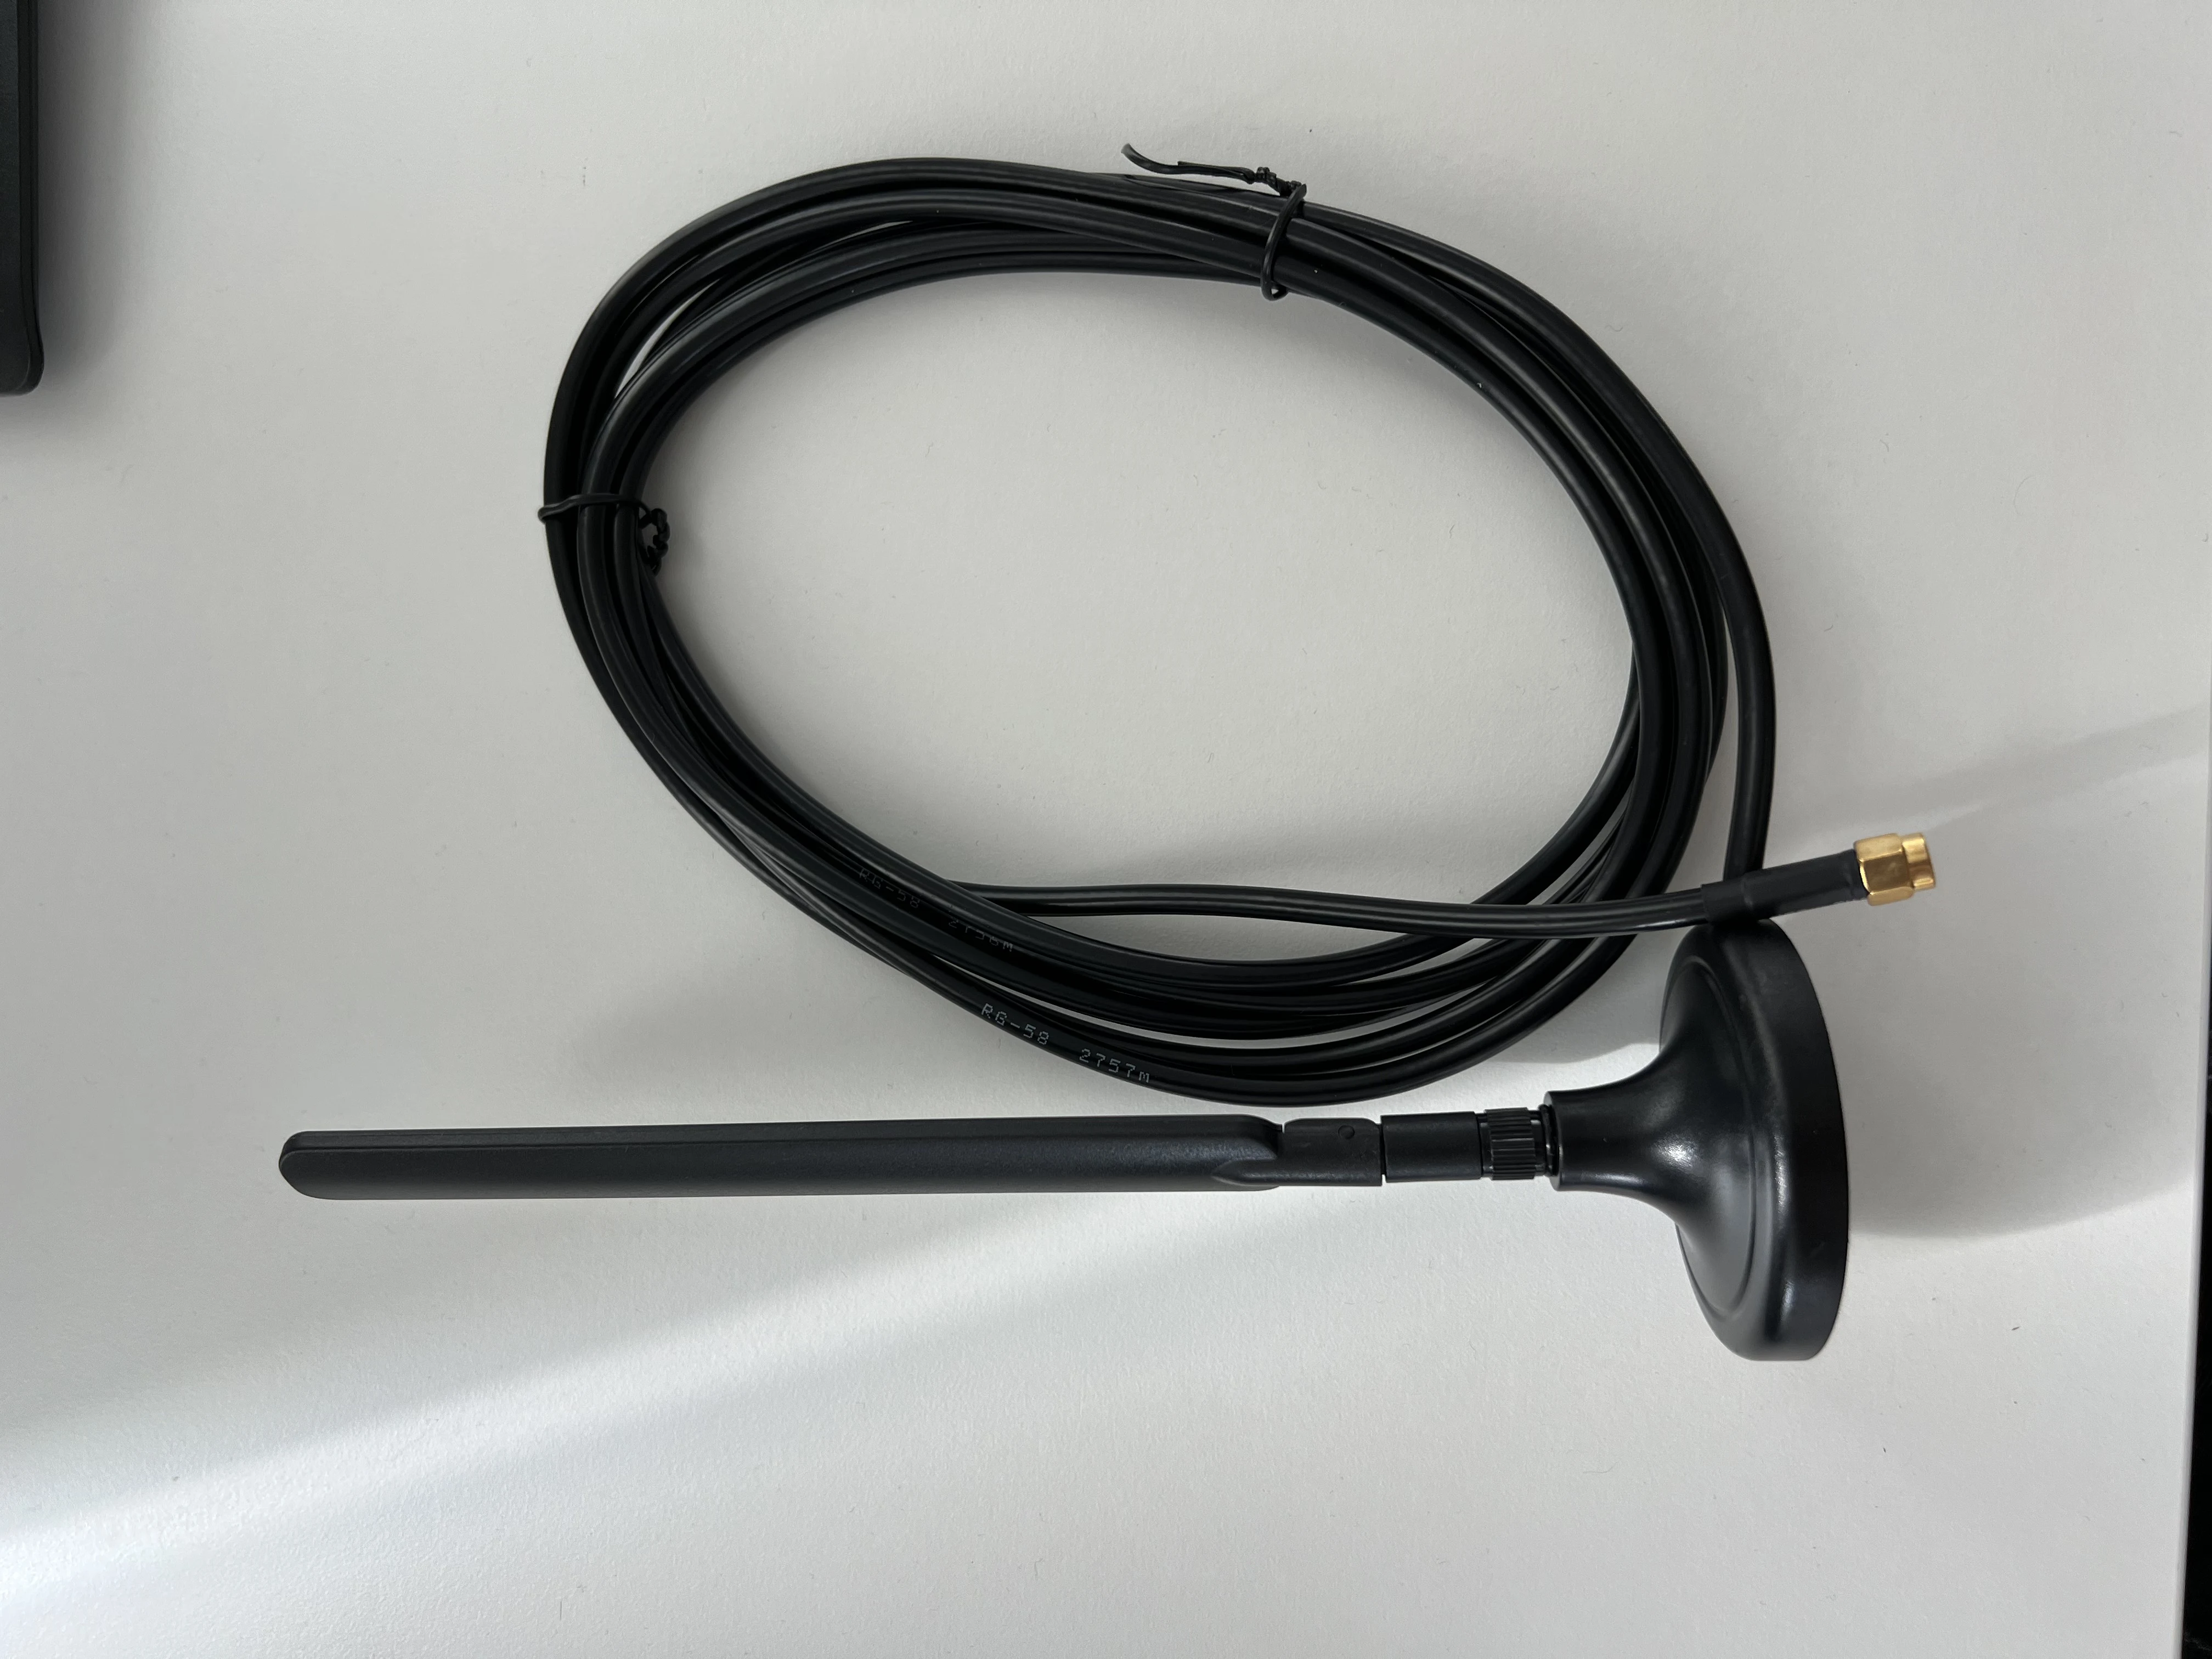
A 5G robot uses 4 antennas per modem:
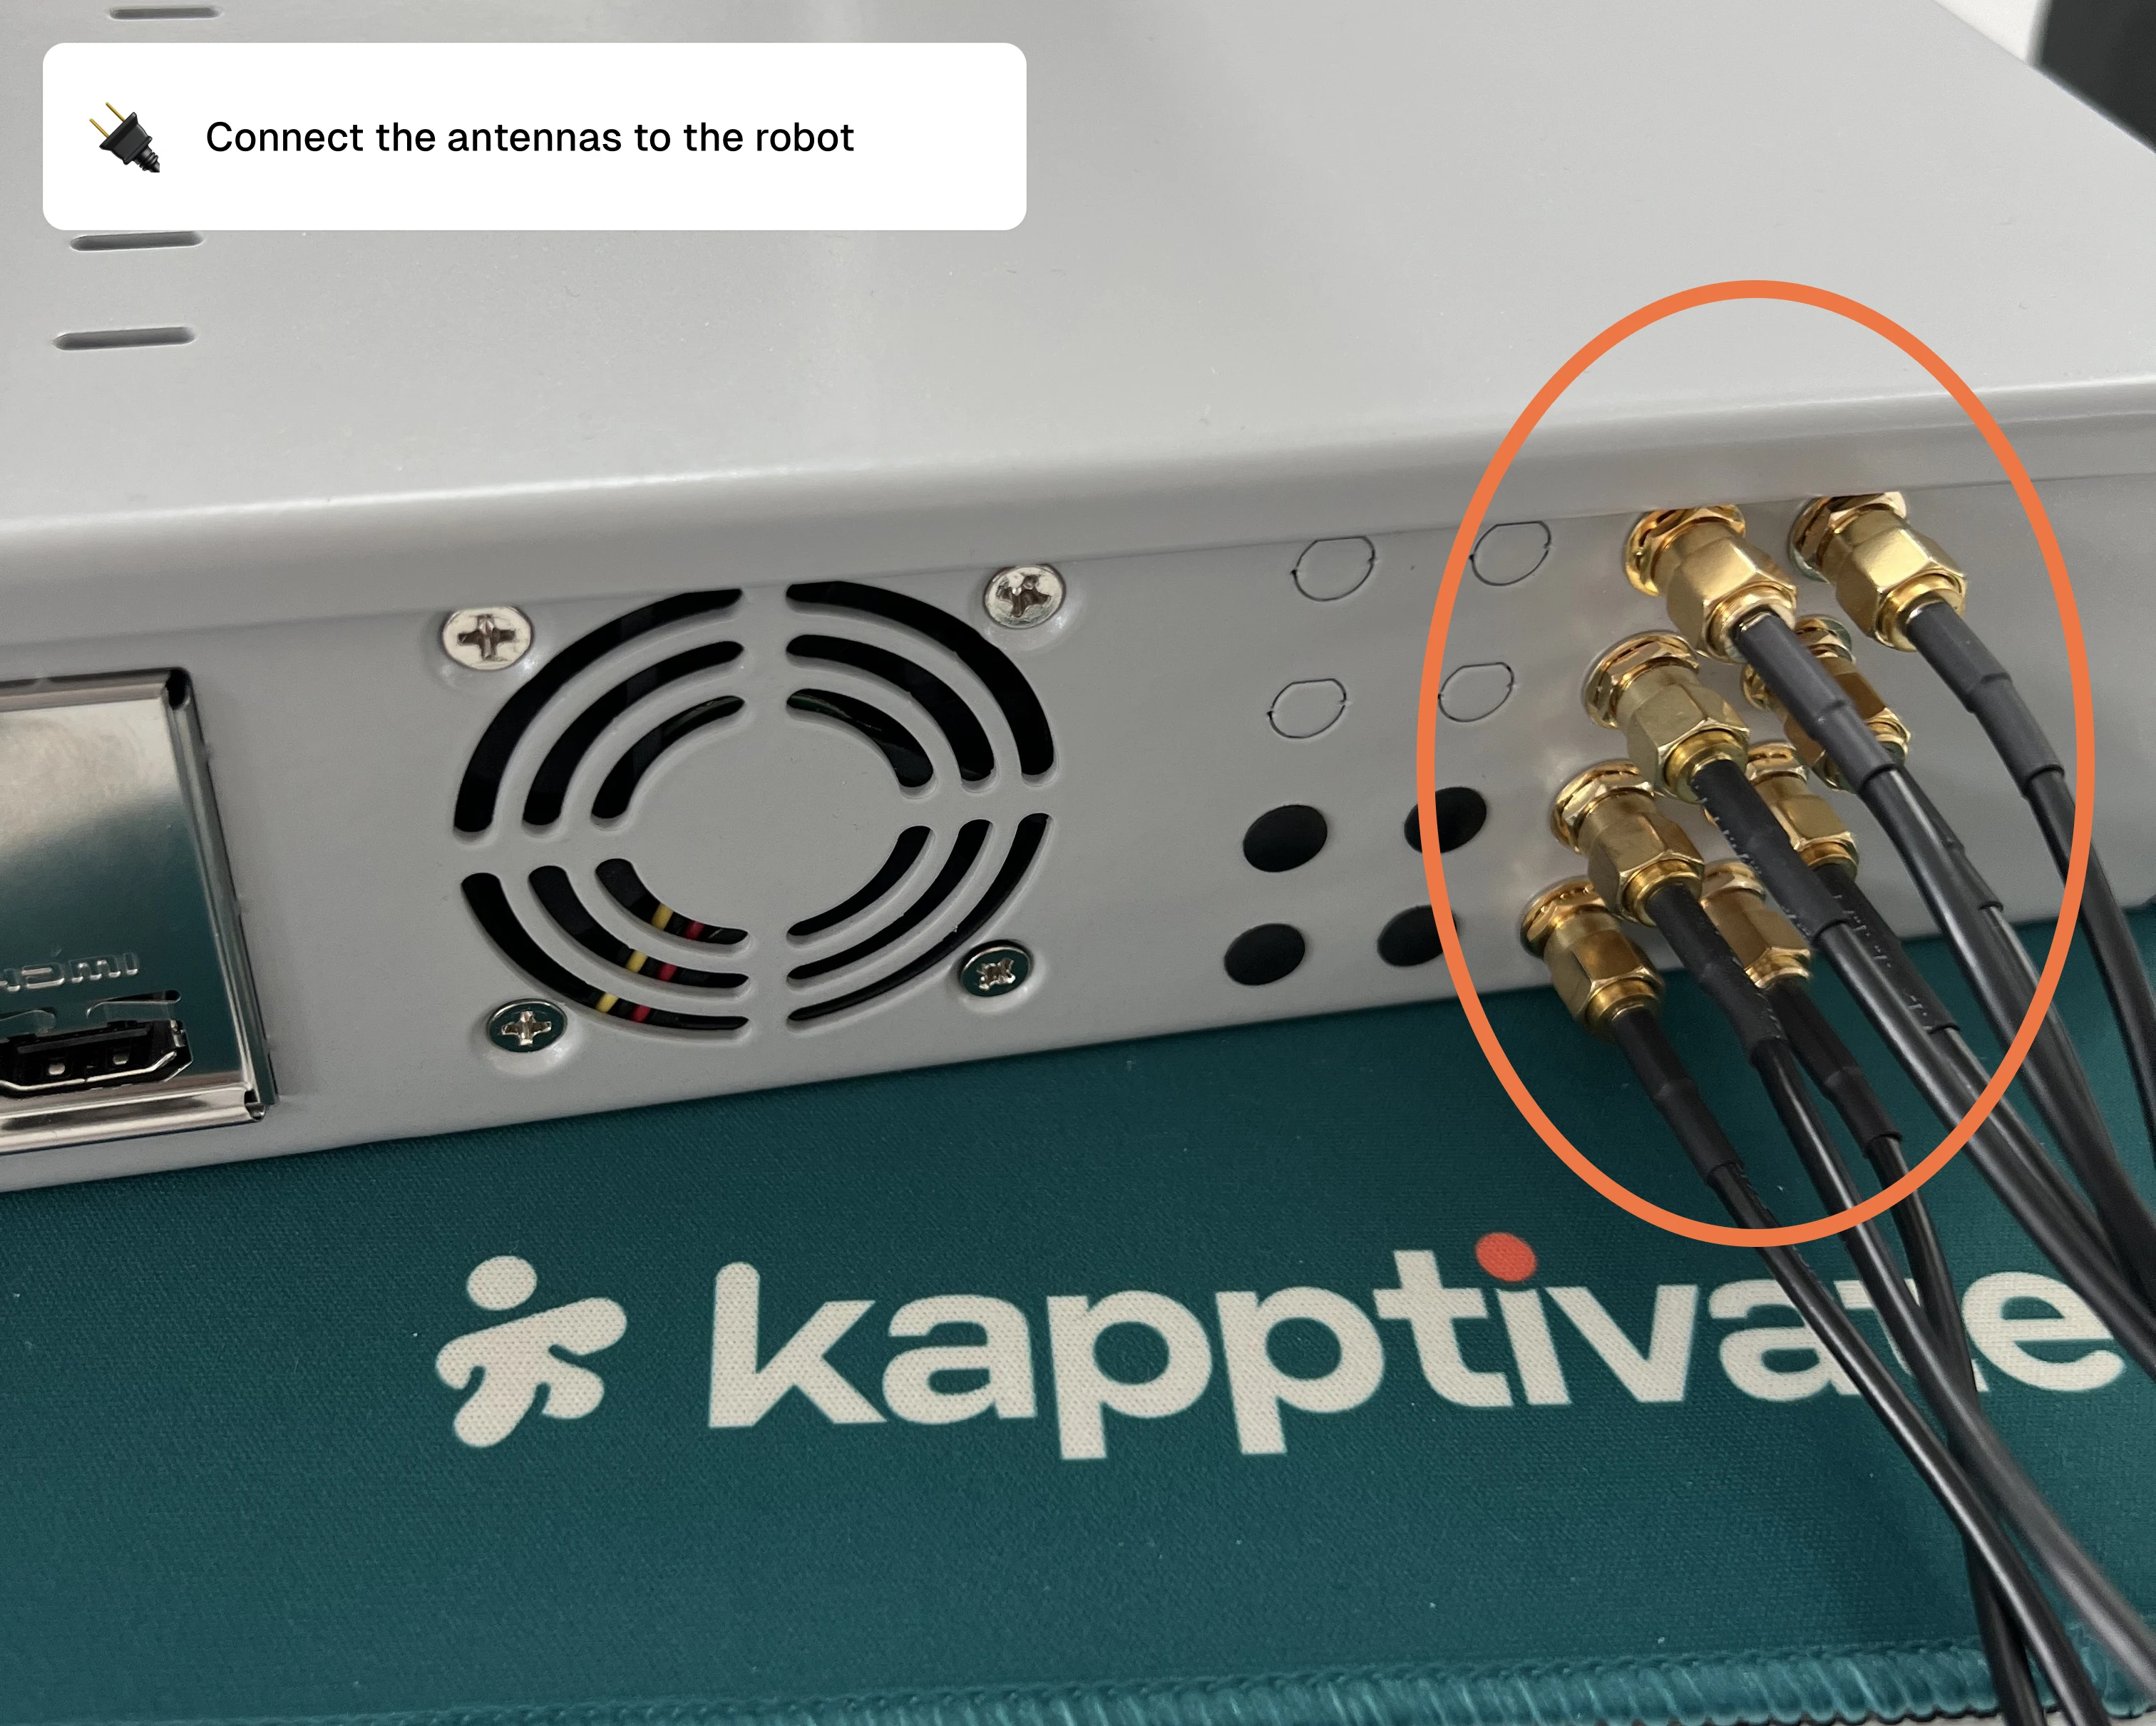
Each modem has 4 connectors at the back. Fit one antenna to each:
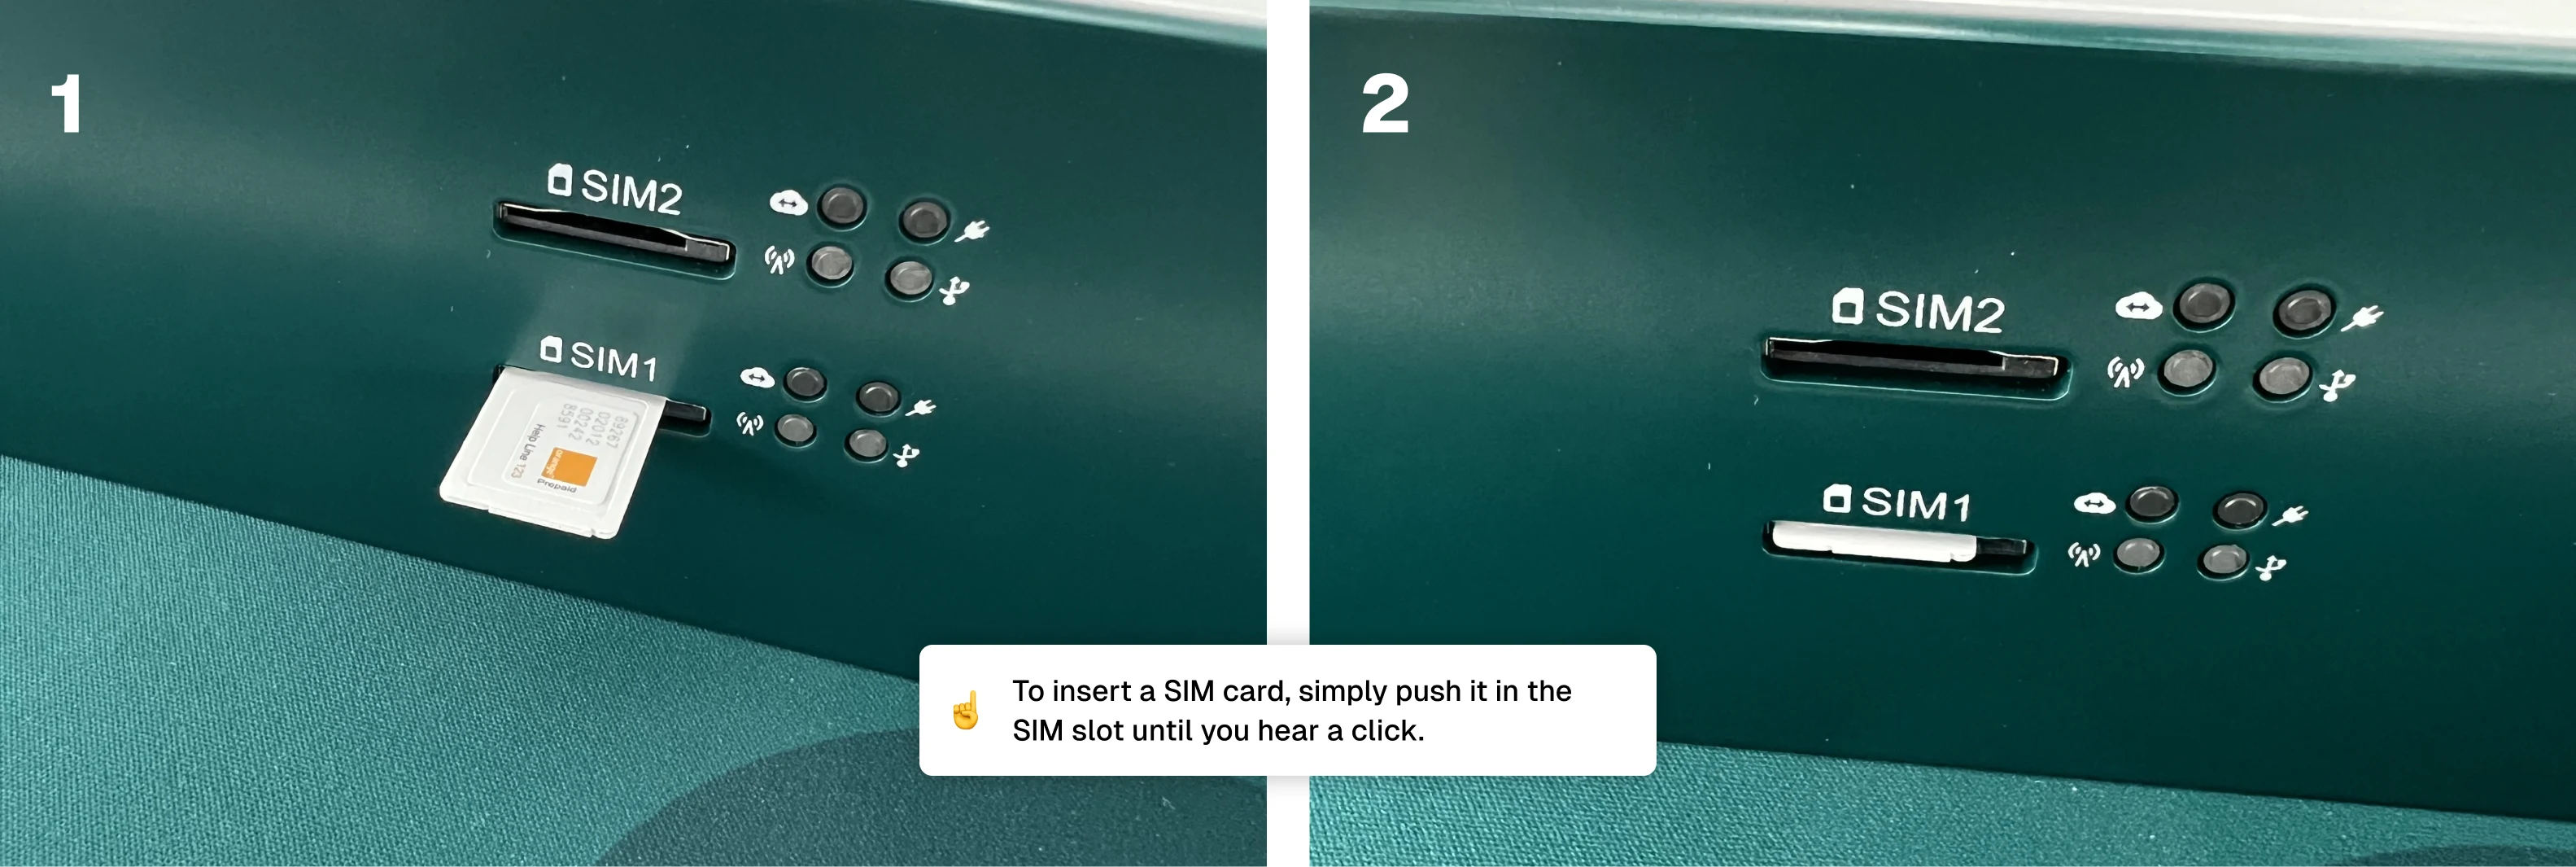
Inserting the SIM cards (5G)
Push each SIM card into its slot until it clicks.
Antennas and SIMs (4G cellular robots)
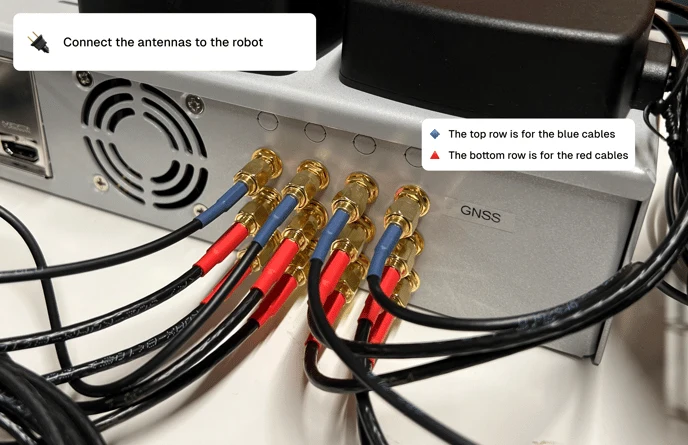
A 4G robot uses 1 antenna per modem, and each antenna carries 3 cables. The blue one is GPS, the two red ones are the 4G connectivity.
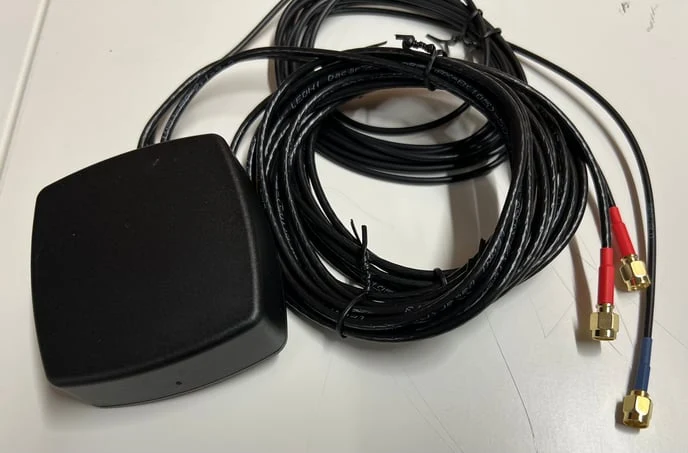
At the back, the 3 connectors of one modem spread across three rows. The blue cable goes on the top row, the red ones on the two rows below.
Inserting the SIM cards (4G)
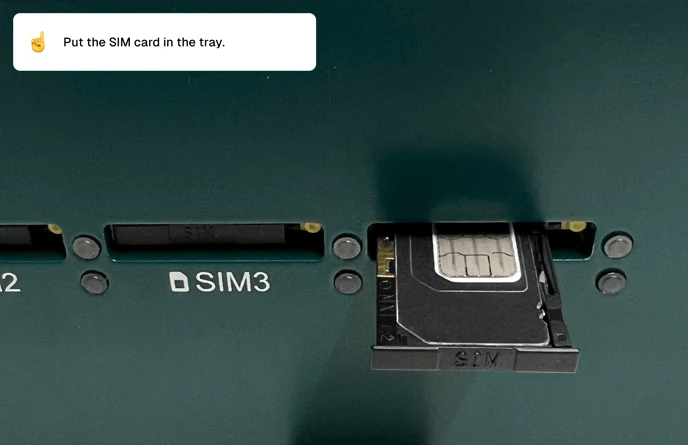
Eject the SIM tray: press the button at its top right corner with the ejector tool. Drop the SIM in, then slide the tray back. Repeat for the other trays.

Connect the USB hub (smartphone robots)
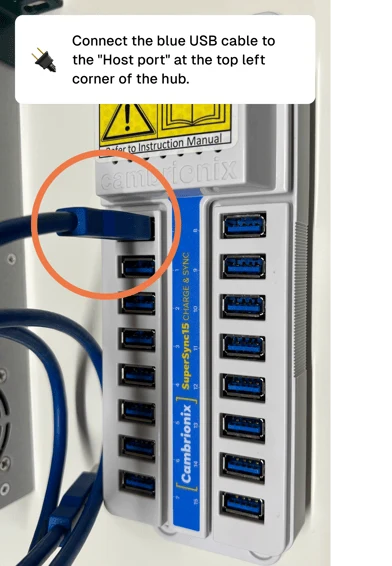
Connect the blue USB cable to the Host port of the hub, in the top left corner:
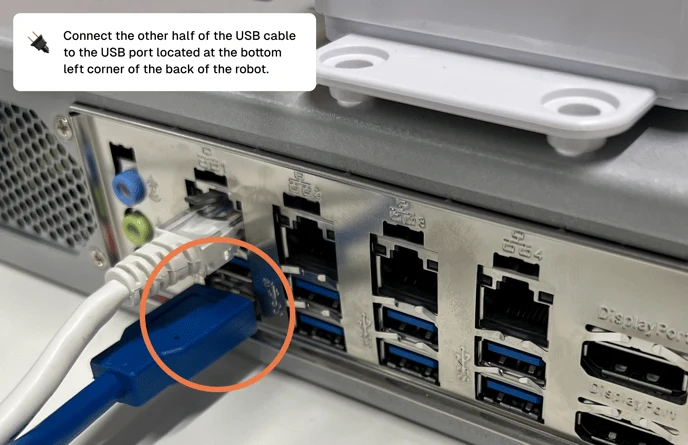
The other end goes into a USB port on the back of the robot, the bottom left one for instance. The others work just as well.
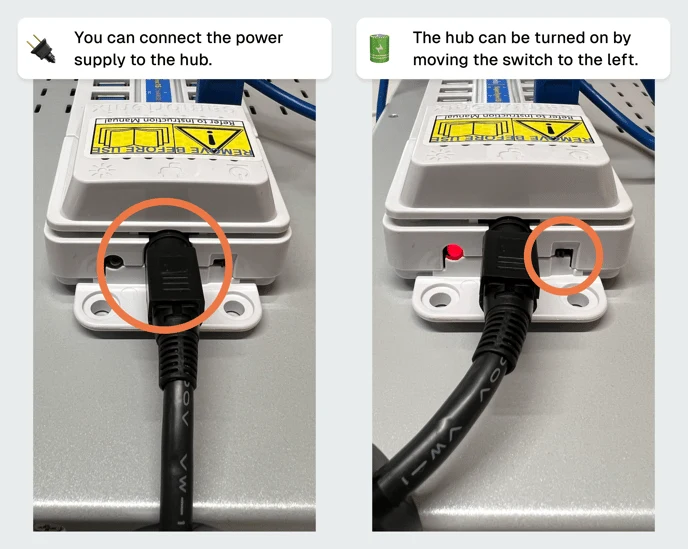
Plug in the hub's power supply. Flip its switch to the left and a red light comes on:
Connect the smartphones to the free USB ports last:
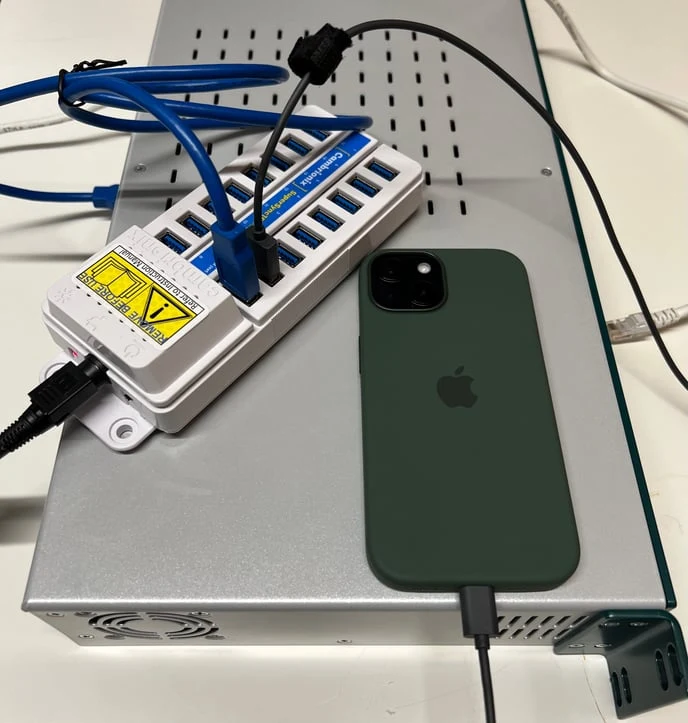
The smartphones only charge while the robot is powered on.
The cabling holds when the robot turns Online in the platform, and power alone won't get it there. Configure its network to give it an address, then ask support to deploy it. A smartphone robot then needs each of its phones prepared, on Android or iPhone.
What's next?
Last updated on