
Jira integration
Connect Jira to Kapptivate so an incident can become a ticket in the project your team already works from.

Connecting Jira lets Kapptivate create and sync issues between its incidents and your Jira projects, so a failing monitor turns into a ticket in the backlog instead of a message someone has to transcribe. The connection happens once, from Administration → Integrations, and it relies on an OAuth integration you create in the Atlassian developer console.
You need two things: permission to create an app in your Atlassian organization, and admin access to your Kapptivate workspace.
Register the callback URL (step 3 below) before the first connection attempt. If the URL is not registered, the authorization never comes back to Kapptivate, and the connection stays pending.
Create the Atlassian integration
Go to developer.atlassian.com/console, click Create, and choose OAuth 2.0 integration.
Open Permissions, find Jira API, click Configure, and add these three scopes:
| Scope | What it allows |
|---|---|
read:jira-work | Read projects and issue types, to fill the pickers |
write:jira-work | Create and update the issues raised from incidents |
offline_access | Keep the connection alive past the first hour |
offline_access is not optional. Without it Atlassian issues no refresh token, and the connection dies after an hour.
Open Authorization, and on the OAuth 2.0 (3LO) line click Configure. In Callback URL, paste the URL below, with your own Kapptivate domain in place of <your-domain>.
https://<your-domain>/api/integrations/oauth/callback/jiraExample: https://app.kapptivate.com/api/integrations/oauth/callback/jira
Open Settings and copy the Client ID and the Secret.
Connect from Kapptivate
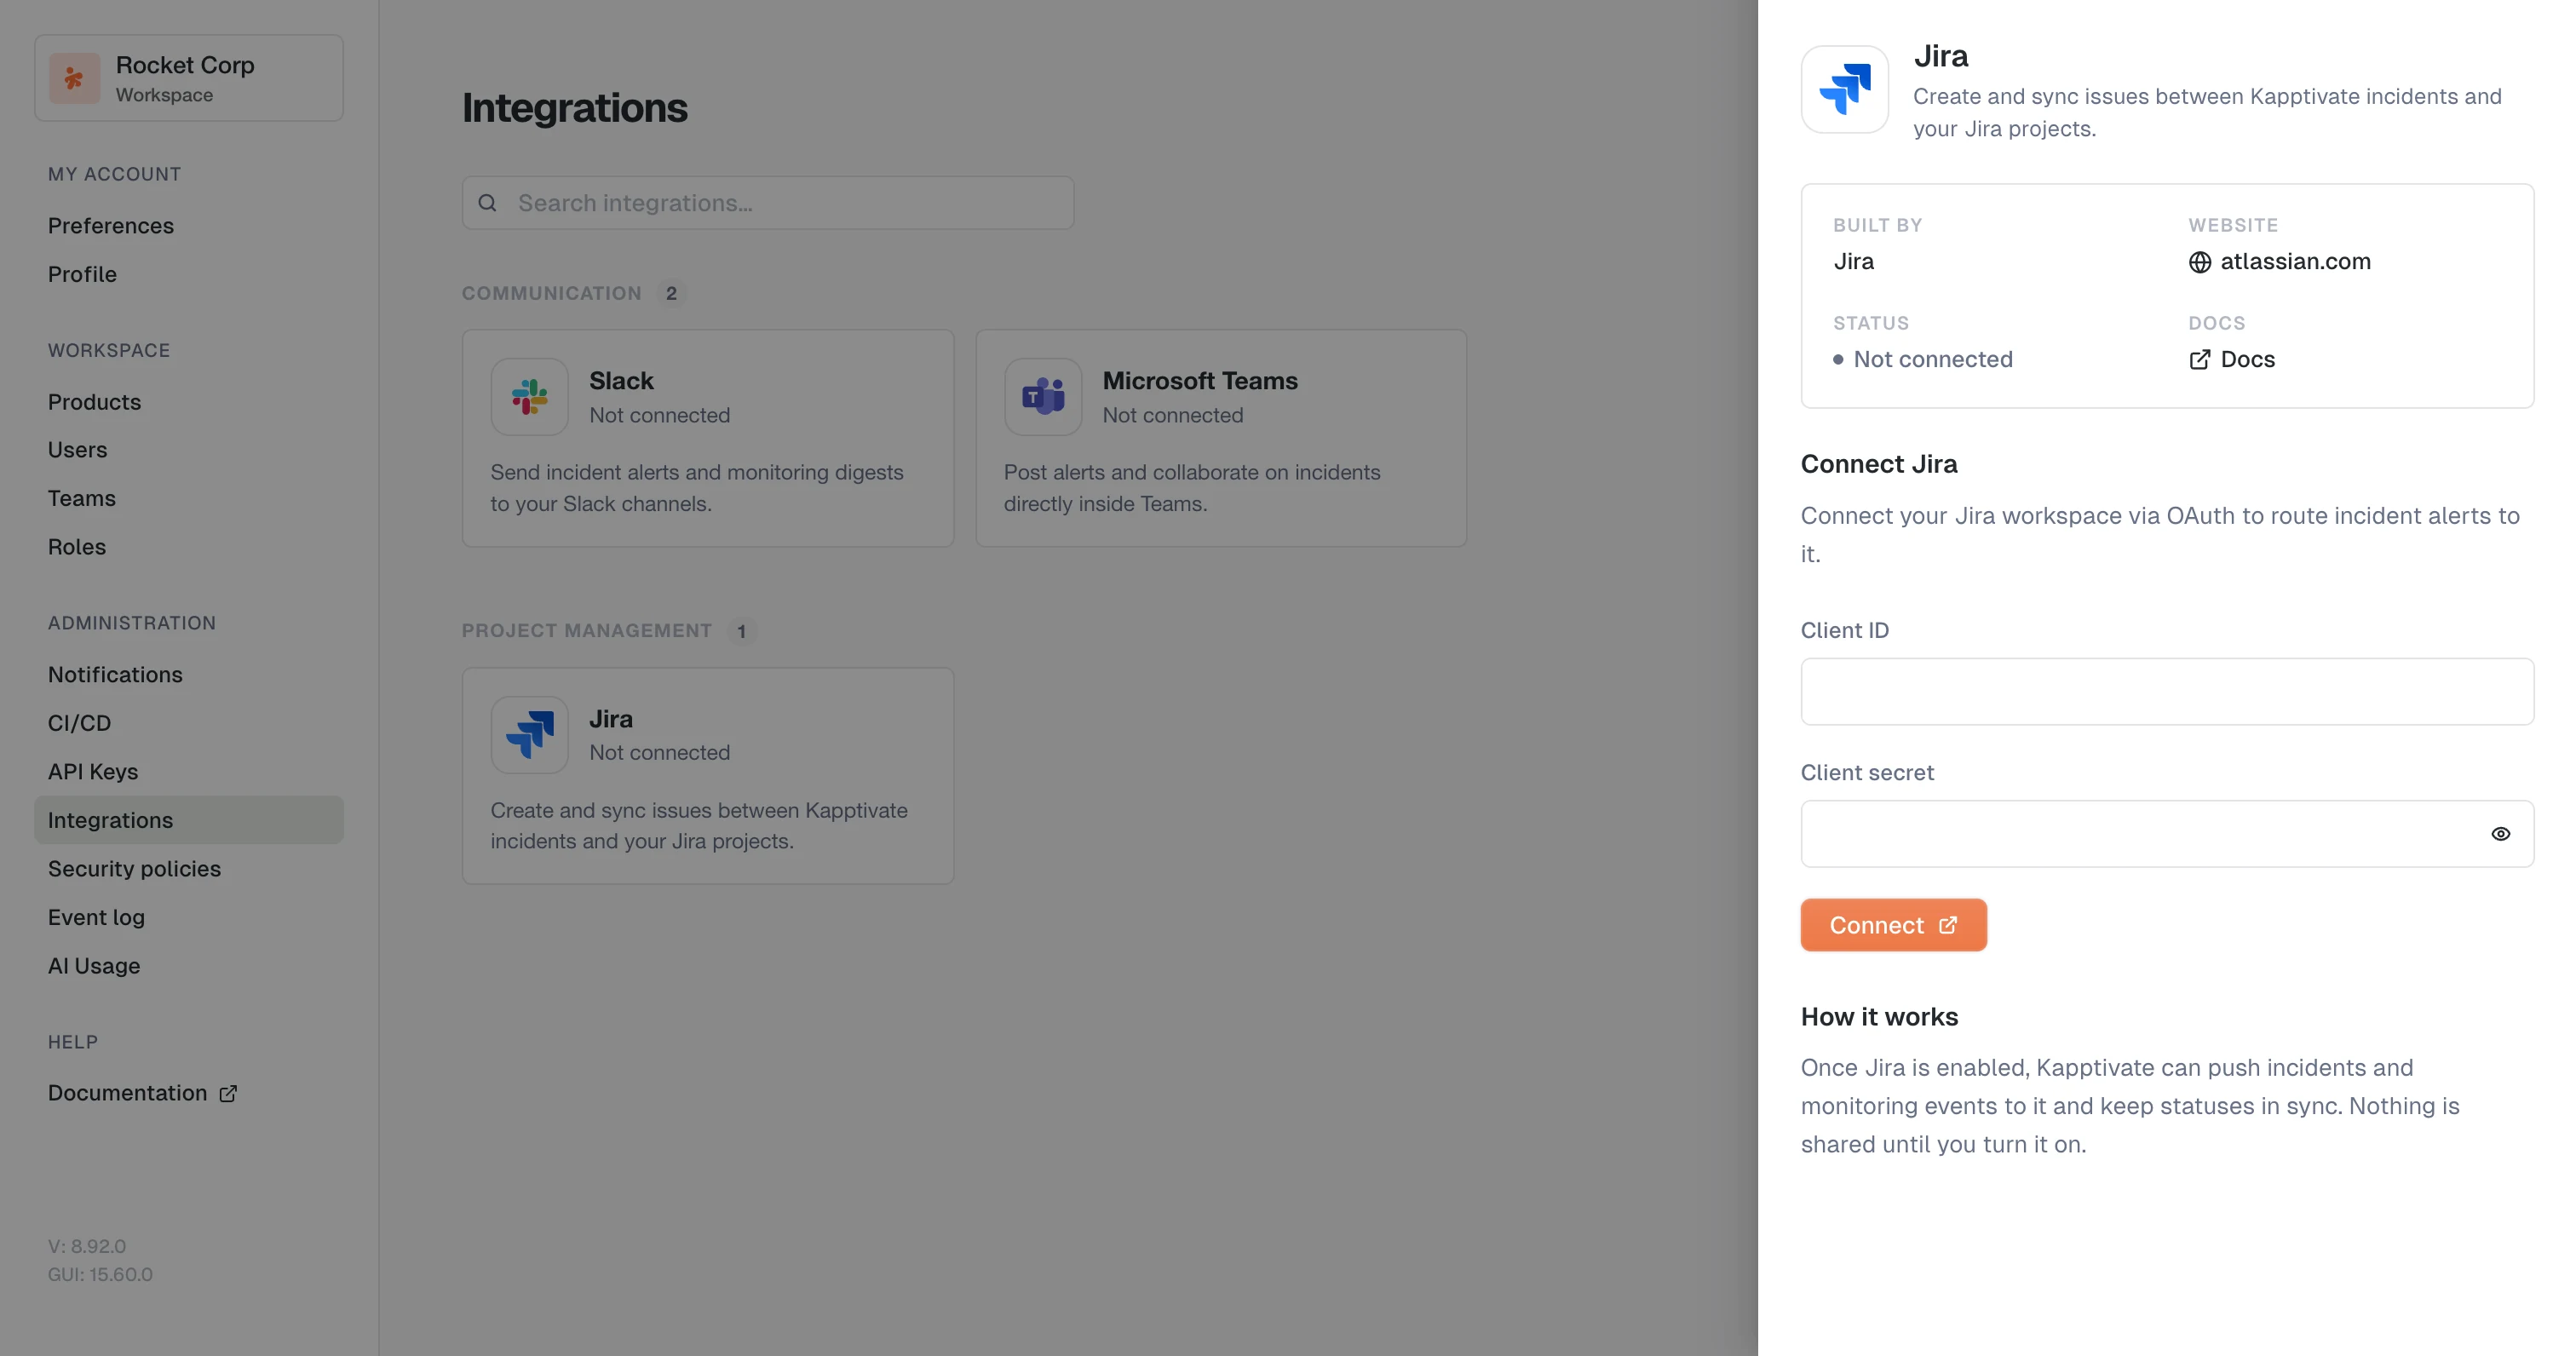
Go to Administration → Integrations and open the Jira card. Paste the Client ID and the Client secret, then click Connect.
A window opens and asks you to grant the integration access to your Atlassian site. Once you approve, you land back in Kapptivate and the Jira card shows Connected.
Choose the default project and issue type
A connected integration still needs to know where to file. In the Integration details panel, under Default settings, pick a Default project and an Issue type, then click Save. An alert that does not name a project of its own files here.
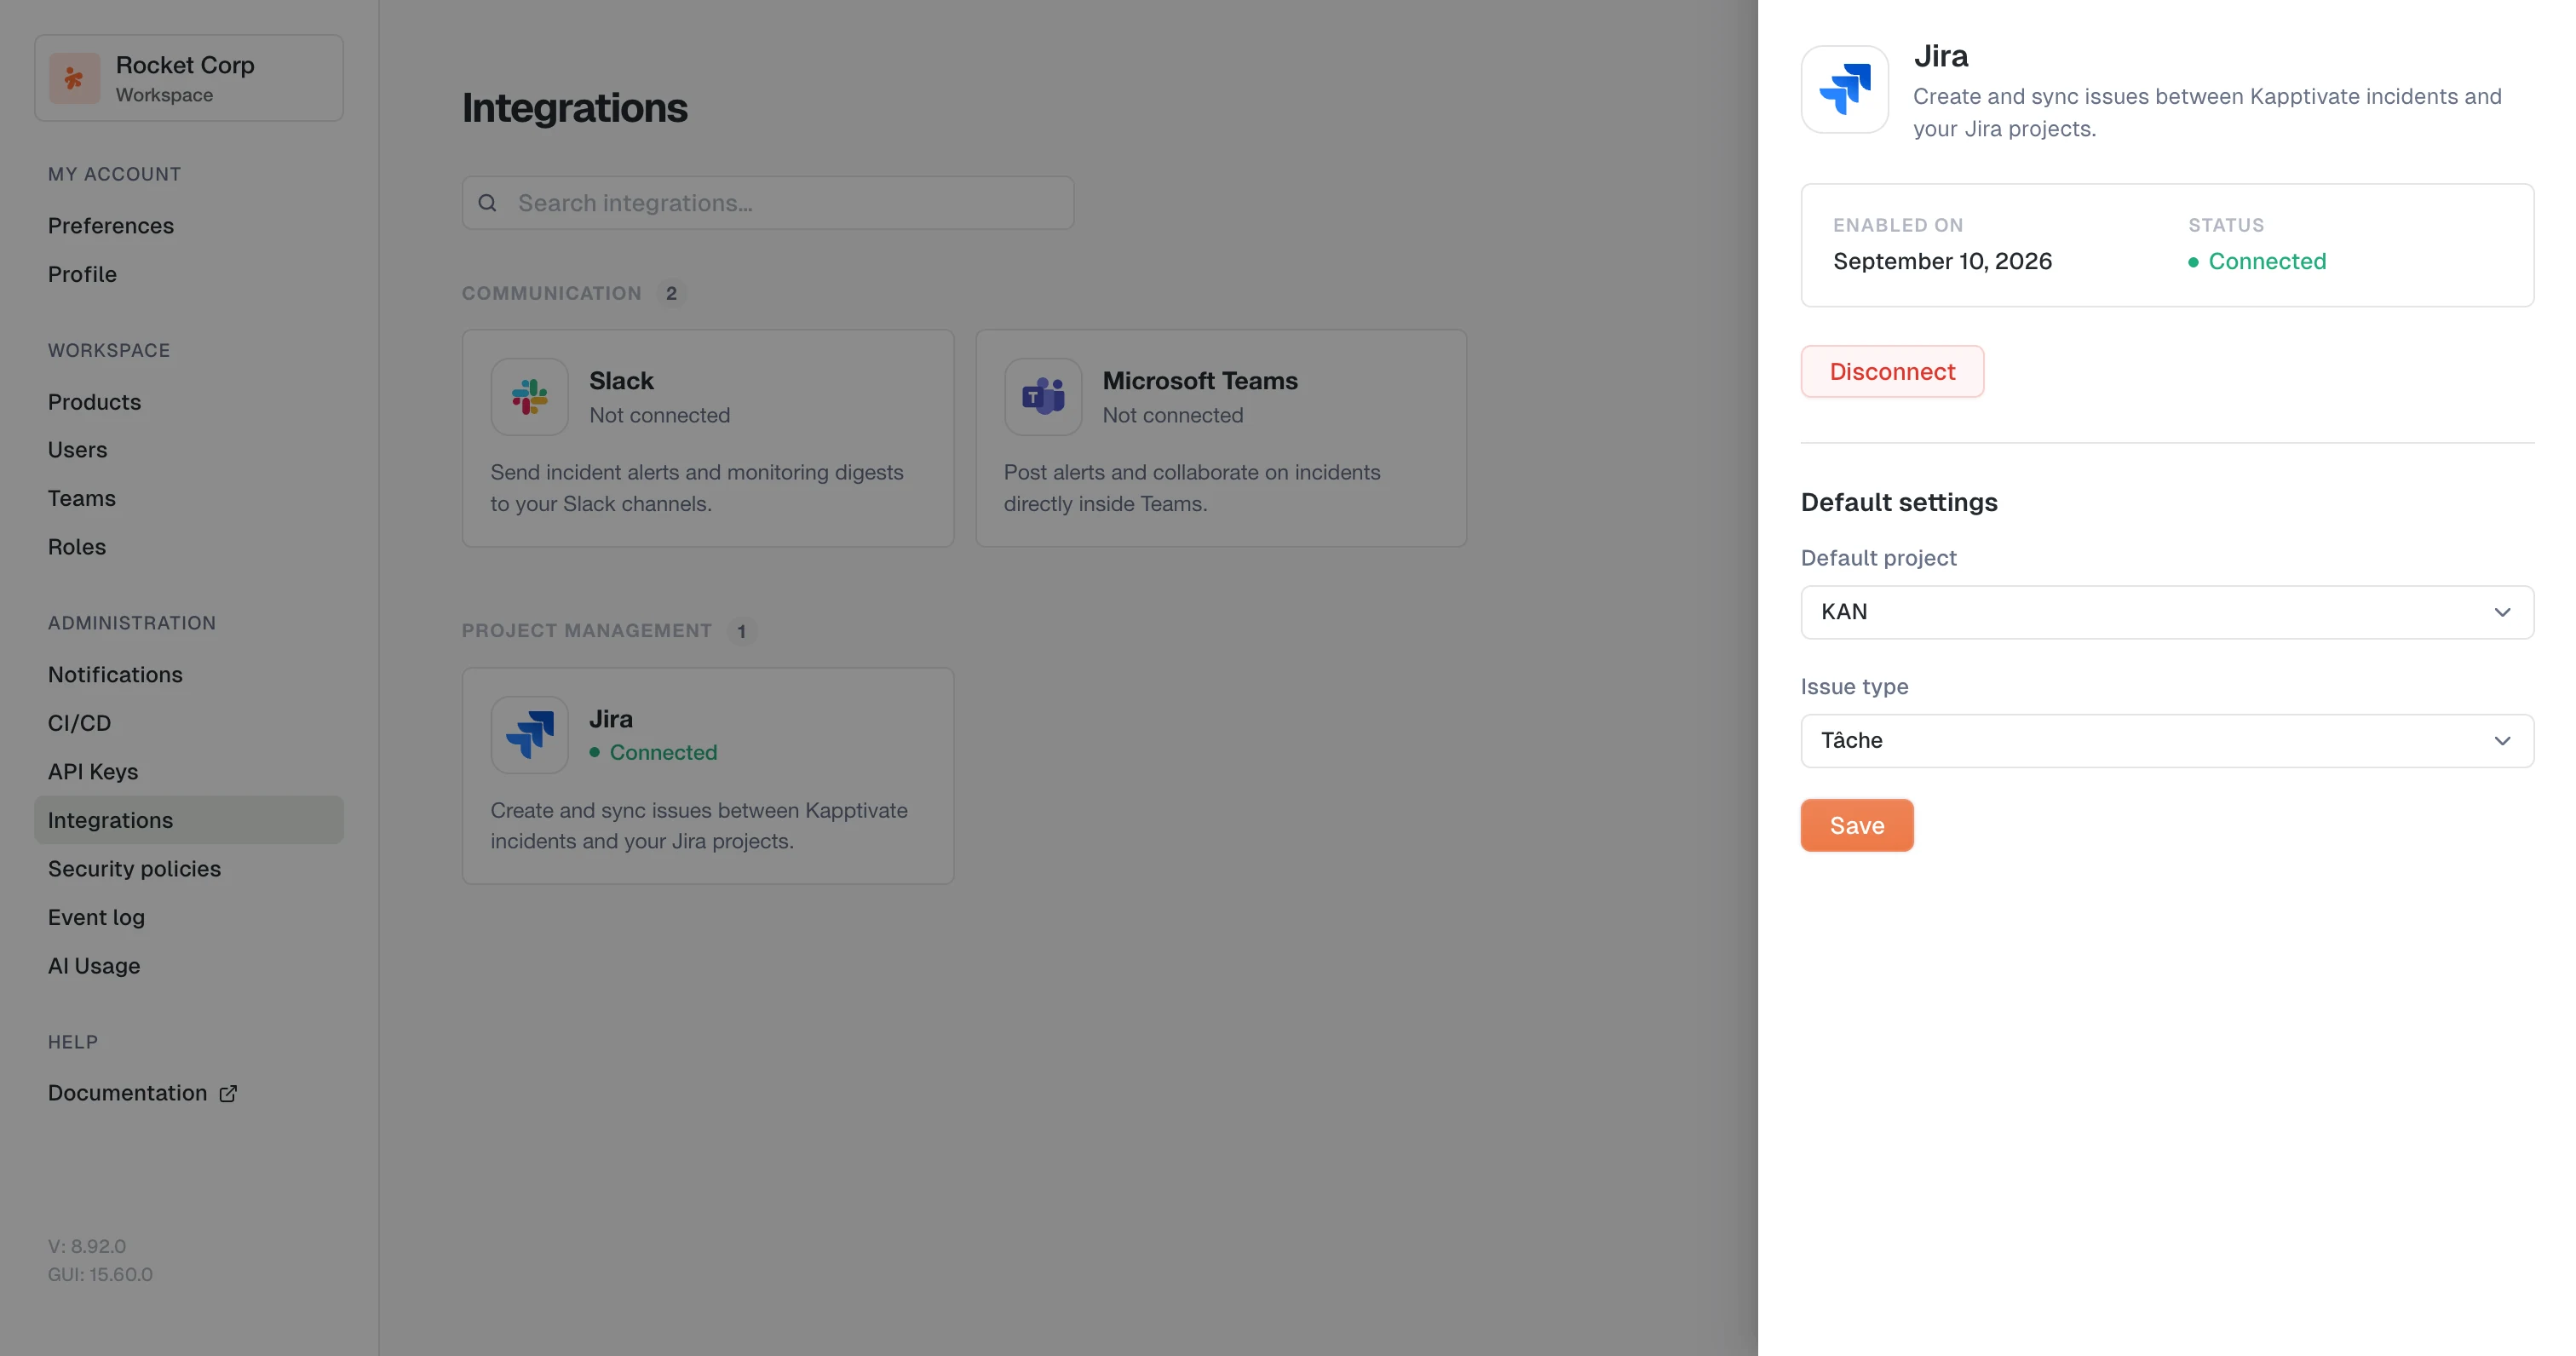
The pickers list what the integration can see with the scopes you granted. If a project is missing, check that the account that authorized the integration has access to it in Jira.
Disconnect
In the Integration details panel, click Disconnect. Kapptivate stops creating issues, and the card goes back to Not connected. Issues already created in Jira stay where they are.
Other integrations
Last updated on