
Replace a robot's motherboard battery
Fit a new motherboard battery in a Kapptivate robot, on the older white chassis and on the latest hardware.
A robot that goes down with the mains and stays dark when the power comes back has a flat motherboard battery. It's a wear part: it drains on its own, whatever the robot does. Count ten minutes for the swap, with the robot off and out of the rack. Older hardware then needs a BIOS update on top.
Kapptivate maintains the robots it hosts. This page is for the ones that sit in your own racks.
Before you start
Support supplies the battery. The model changes from one generation to the next, so leave that call to them: write to support@kapptivate.com, who identify your robot and ship the one that fits.
Then gather:
- A screwdriver, for the two lid screws and for the rack screws.
- A thin tool to lift the battery off its glue. A small flat screwdriver does the job.
- A window where the robot can go down. It runs no tests while it's powered off.
On an older robot, a BIOS update follows the swap. Ask support for its guide in the same message as the battery, and line up a screen, a keyboard and a USB stick prepared on a Windows PC.
Find out which generation you have
Two chassis colors, two places to look for the battery. Check which one you have before you unscrew anything.
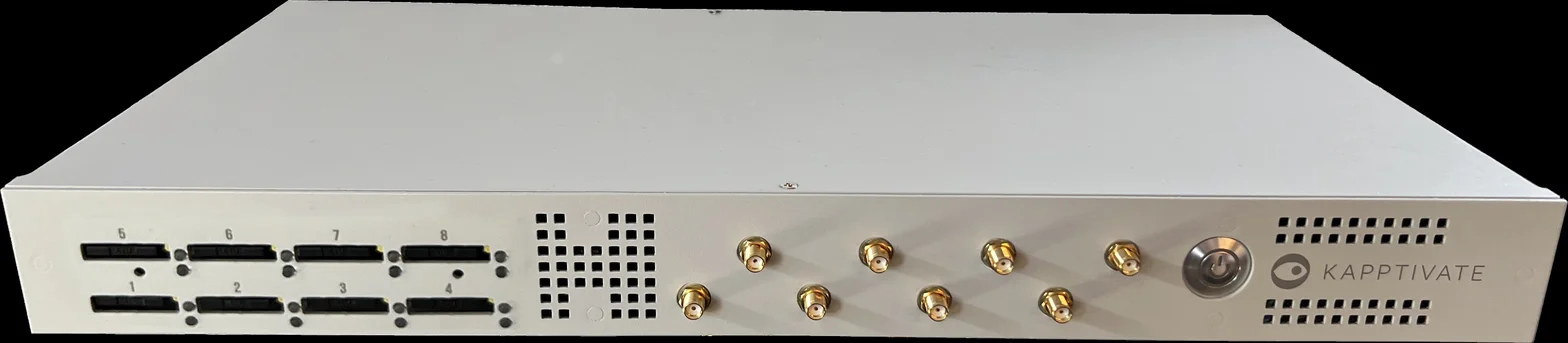
White is the older hardware:
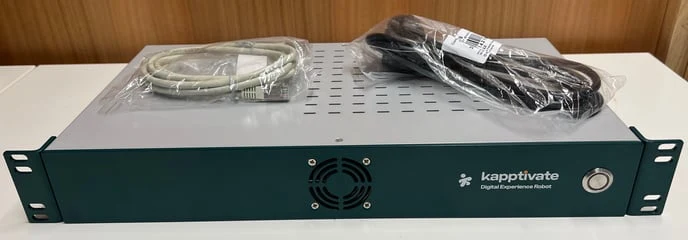
Gray or green is the latest generation:
Not sure from the color? Send the robot's name to support@kapptivate.com and ask which generation it belongs to.
Either way, the robot goes off and comes out of the rack first. Only the swap itself depends on the generation.
Power the robot down and take it out of the rack
Press the power button on the front panel and let the robot shut down. The fans stop.
Pull the power cable, then the RJ45 cable. Unscrew the antennas on a cellular robot, or unplug the USB hub on a smartphone robot.
The lid comes off the top, and a racked robot keeps its motherboard out of reach. Undo the two screws on each side of the front panel, slide the robot out of its slot, and set it down flat.
Replace the battery on an older robot
Remove the two screws on top, then slide the aluminum plate towards the back.
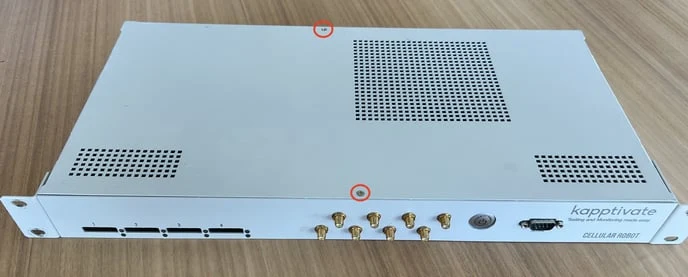
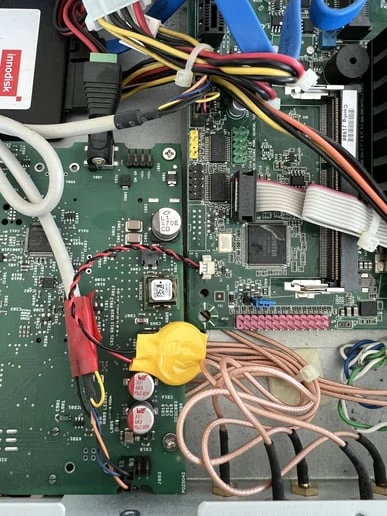
It sits flat in the lower left corner of the motherboard, glued down, on one red and one black lead.
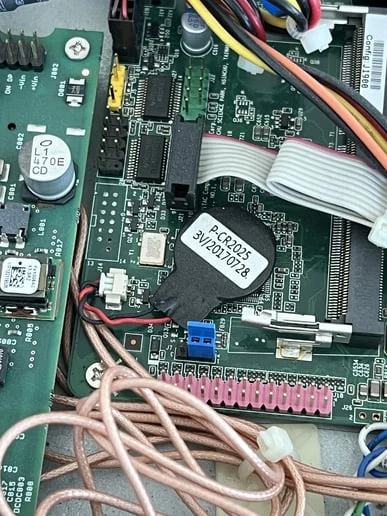
This generation is a tight fit. Undo the four screws at the corners of the motherboard. Lift the board with everything still plugged in, far enough to work on the battery.

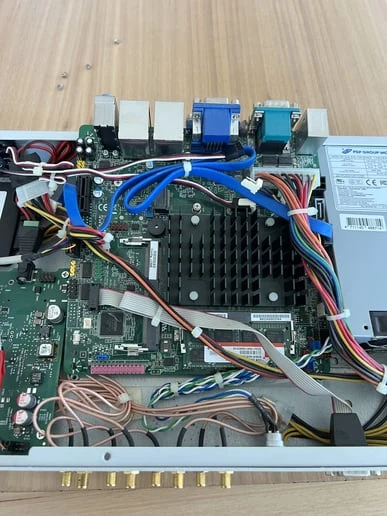
Work the battery off its glue with a thin tool, then unplug it by its connector, never by the leads. Plug the new one into the same connector and lay it in the same spot. Put the four motherboard screws back if you lifted the board.

Put the aluminum plate back and tighten its two screws.
Do this with the robot still flat on the table: its screen and keyboard plug in at the back of the robot. Connect them along with the power cable, switch the robot on, then work through the guide support sent you. Power the robot back down once the configuration is saved.
Replace the battery on the latest hardware
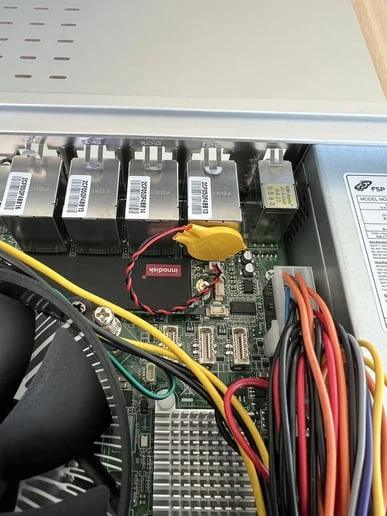
Remove the two screws on top, then lift the aluminum plate off.
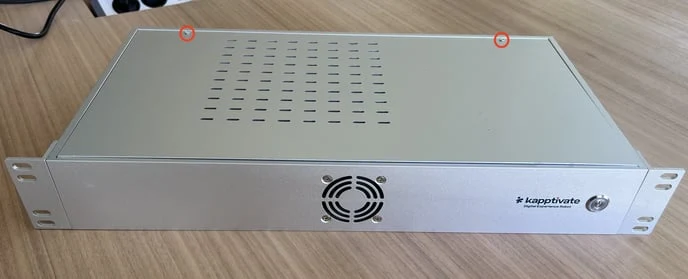
It rests on the motherboard, against the power supply. Look for a flat pack glued to the board, wired to it with one red and one black lead.
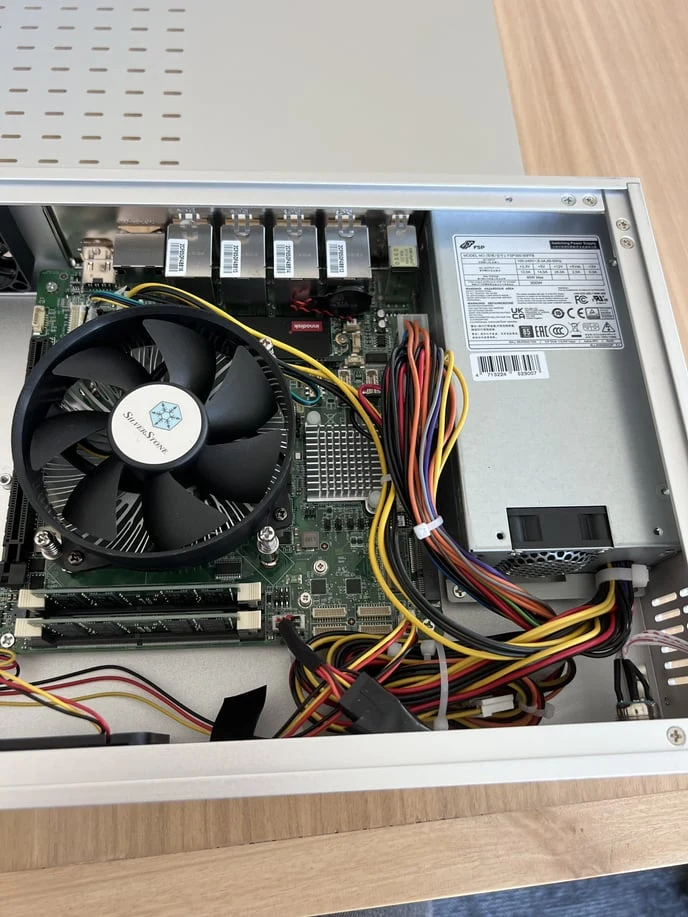
Work the battery off its glue with a thin tool, then unplug it by its connector rather than by the leads. Plug the new one into the same connector and lay it in the same spot.

Put the aluminum plate back and tighten its two screws.
Rack the robot and switch it on
Slide the robot into its slot and tighten two screws on each side. Plug the cables back the way they were: antennas or USB hub, then the RJ45 cable in the Ethernet port it left. Power comes last, then press the button on the front panel.
Check that the robot is back
The platform has the answer. Your robot is listed under Agents, and it comes back as Online once it has booted. Its devices and its SIMs follow, back to Available.
A robot still offline has usually not finished starting: wait a minute and look again. After that, suspect the RJ45 cable, which belongs in the Ethernet port it left. Troubleshooting a robot that stays Offline covers the rest.
What's next?
Last updated on