
Creating a test
Learn how to create a test by choosing a channel, setting a starting point, configuring device options, and adding steps in the builder.
Creating a test starts with choosing a channel (Web, Smartphone, or Cellular), then setting a starting point and device. After creation, you add steps to define what the test does. This page walks through the setup flow for each channel.
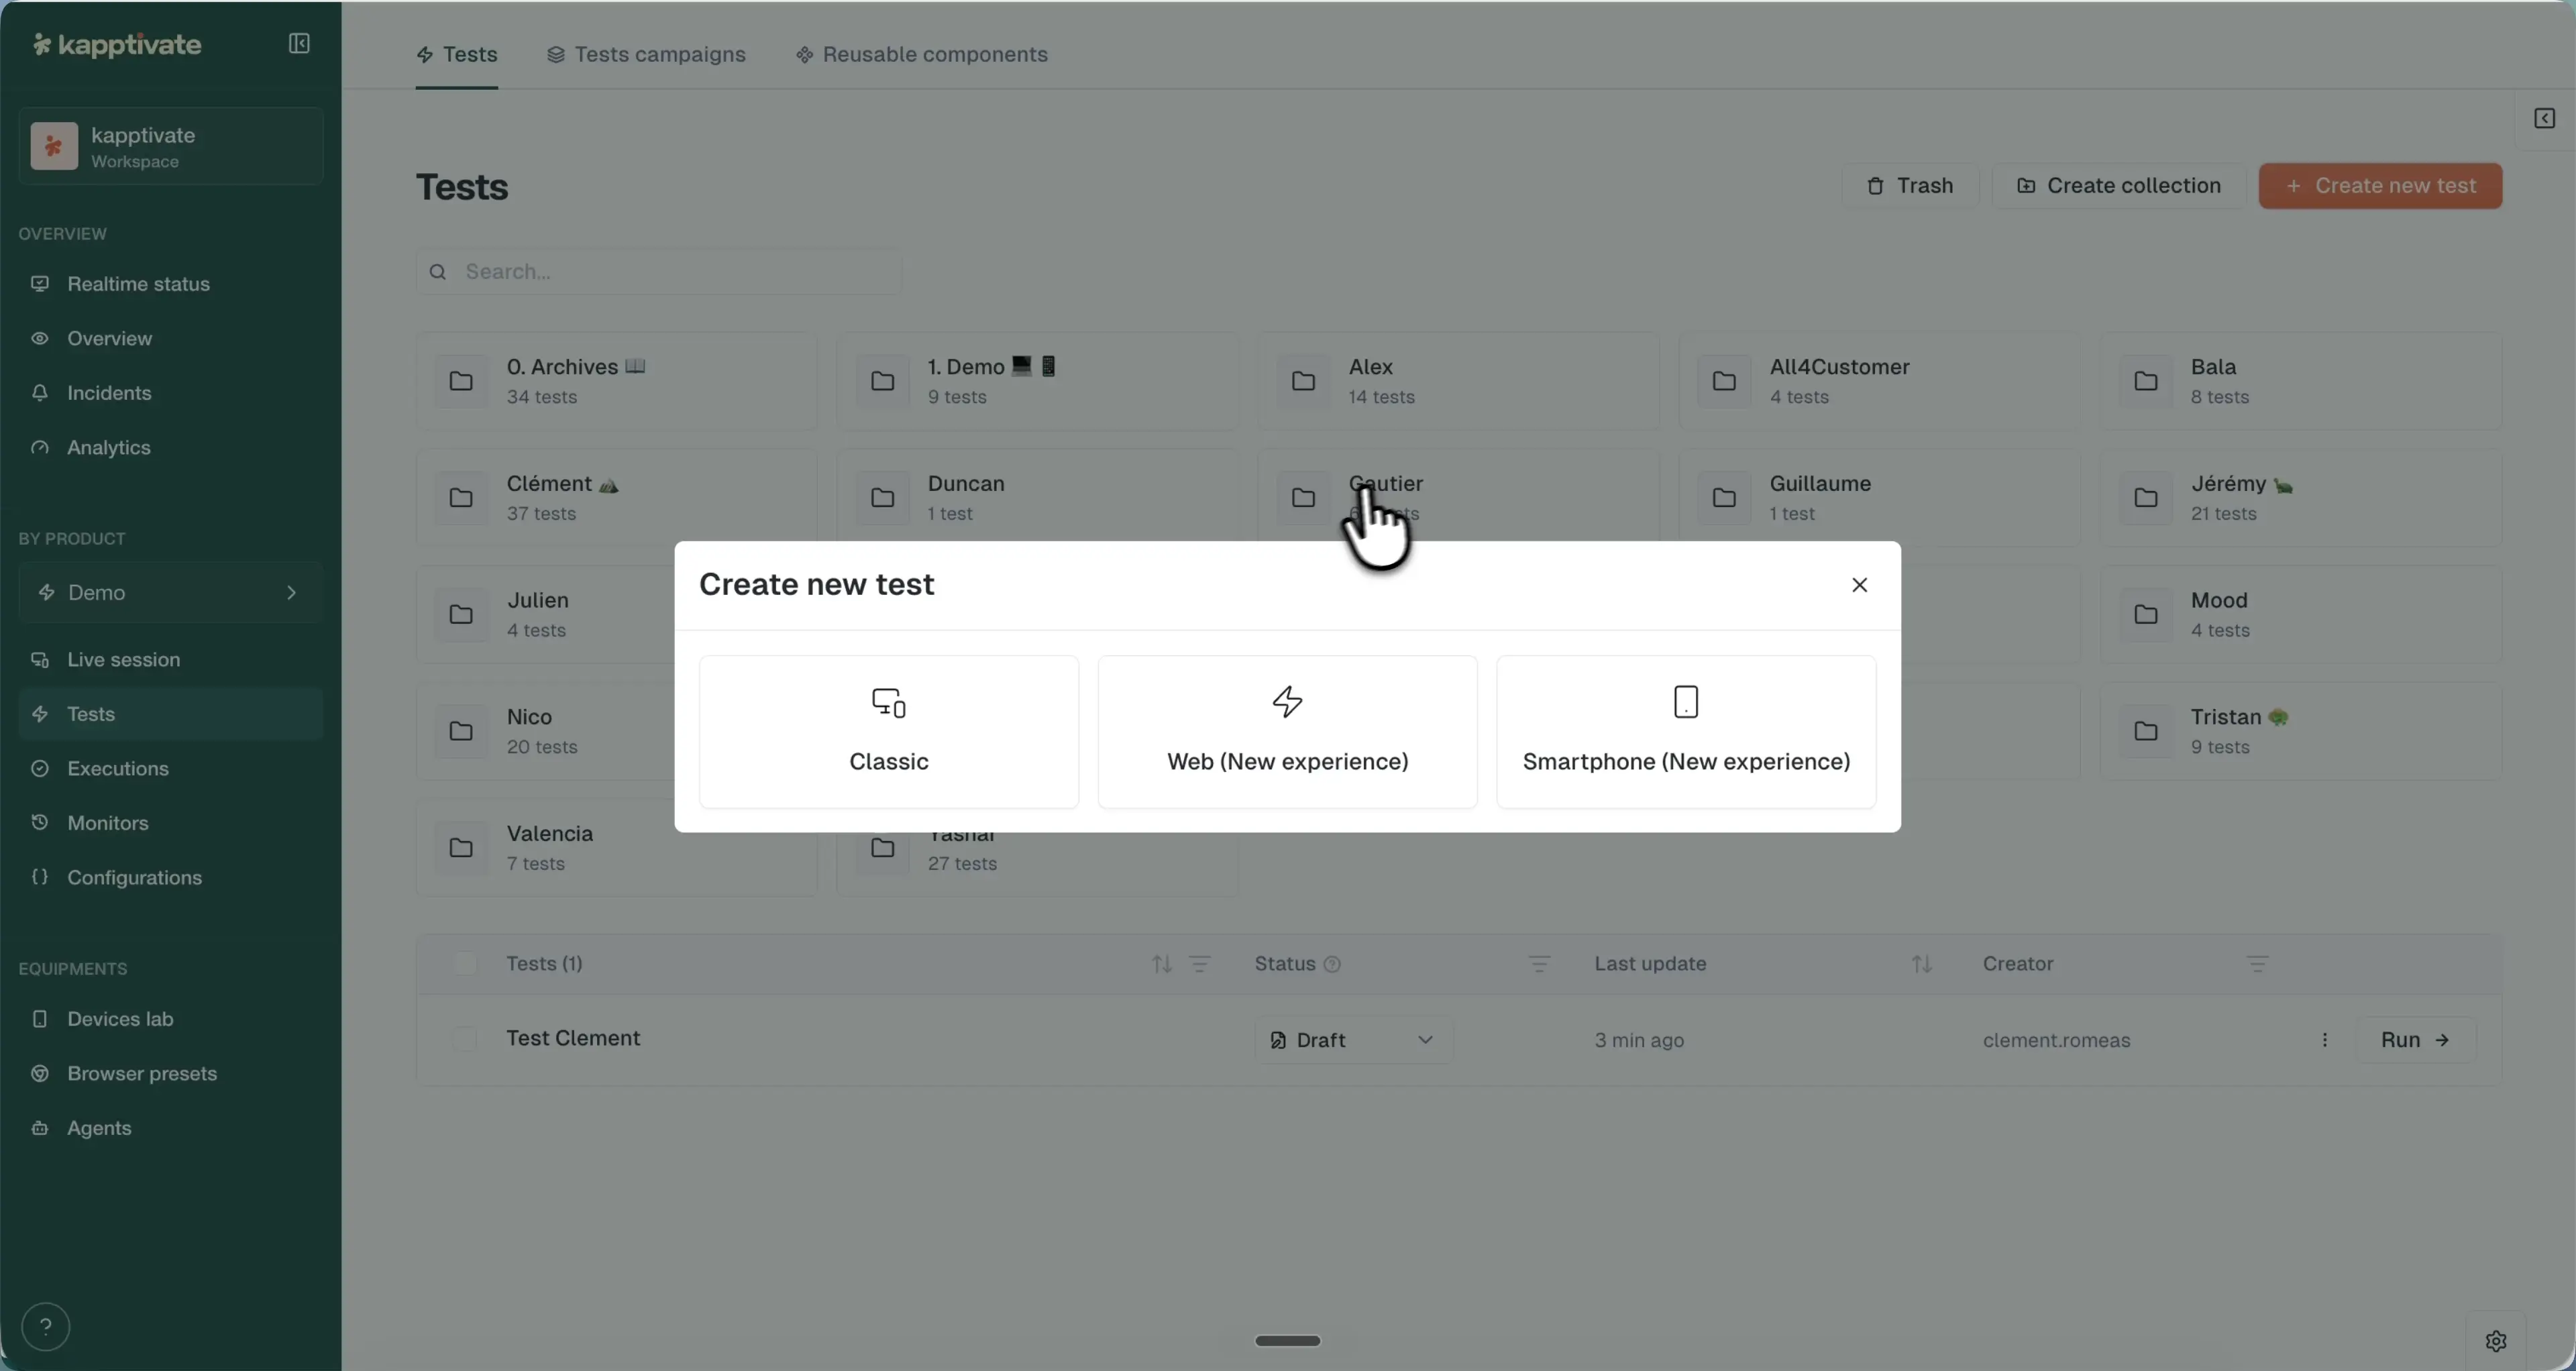
Start a new test
Click + Create new test in your collection. A modal asks which authoring experience to use:
- Classic: the established builder, covering all channels (Web, Smartphone, and Cellular).
- Web (New experience) and Smartphone (New experience): the next-generation builders for those channels.
Then pick your channel and set its starting point:
Web tests run automated interactions in a browser, clicking links, filling forms, checking content.
In the Web (New experience) flow, the creation form asks for:
- Test name: a clear, descriptive name
- Default agent: the web agent the test runs on
- Start URL: where the test begins (e.g.,
https://example.com/login) - AI usage (optional): check Turn on AI for this test to enable AI-assisted selectors from the start
The browser configuration (browser type, window size, language, and more) comes from the browser preset, which you pick in the builder's Environment tab after creation. See Browser presets.
In the Classic flow, you set the browser options directly at creation:
- Browser type: Chrome, Firefox, or Edge
- User agent: use the default or add a custom suffix
- Language: default or a specific locale (e.g., en-US)
- Window size: default 1920×1080 or custom dimensions
To test an HTTP service, add API steps inside a Web or Smartphone test: set the method, URL, headers, and body, then assert on the response and extract values for later steps.
Test properties
In the Classic flow, you fill these in at creation. In the new experience, you give the test a name at creation and set the rest later in the builder's Test settings tab:
- Test name: a clear, descriptive name
- Description (optional): notes about what the test does
- Collection: which folder to place the test in
- Tags (optional): color-coded labels to organize and filter tests
Next: Author your test
Once you create the test, the editor opens. You are ready to build your test's behavior by recording interactions or manually adding steps from the actions library. The test builder is where you'll spend most of your authoring time, organizing steps into groups, adding assertions, managing variables, and configuring advanced options.
Last updated on